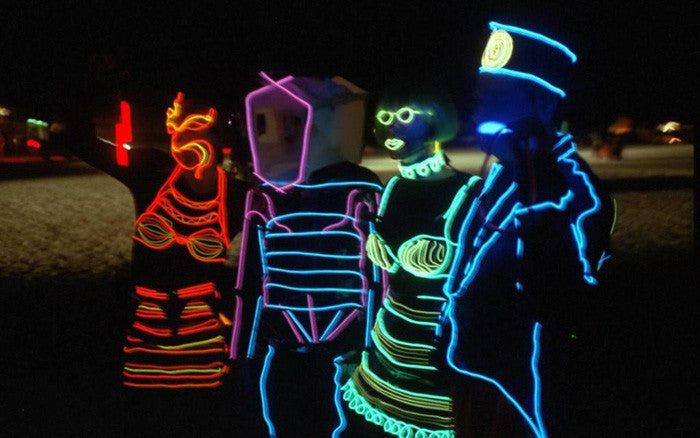
Want to be the star of a house party?
Create the best dance performance?
... or have an amazing rave outfit for that upcoming festival?
Then you're the right place because in this article we are going to be using an EL glowing wire to light up your costume.
But, what do you need to get started?
How am I supposed to do it?
We will provide you with a full list of materials that you will need to...
...add a neon touch to your outfit!
This guide will help you to accomplish this mind-blowing project and make you the envy of all your friends.
Materials
-
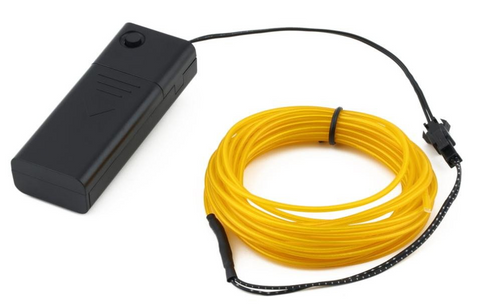
EL Glowing Wire:
Choose your favorite color or a stunning combination of colors to create your desired look. You can look at our neon glowing wire's here or visit a local party shop in your town. If you’re not getting an EL wire kit, make sure to get all the required components to attach them with weld, these are EL wire driver, battery holder, and a switch.
-
Garment or suit:
The addition of EL wires to your outfit could limit some of your moves. To avoid breaking the wires whilst dancing use suitable fabrics such as denim, vinyl, thick cotton blends, suede or velvet.
-
Thread:
Clear fishing line thread is the preferred thread. A standard thread will cover light of the EL wire where the stitches are made.
-
Needle
-
Scissors
You may also need some pins and a pocket, just in case your garment doesn’t have one because you don’t want the driver bouncing out while dancing.
When soldering, you’ll also need:
- Solder
- Heat gun
- Solder iron
- Wire cutters
- Wire strippers
- Sewing materials.
Source: enlighted.com
Directions
Are you ready to show off your skills as a fashion designer and seamstress? Follow these steps below:
1. Choose Your Design.
Do you like music, animals or nature? What about flowers? Look for some inspiration and create a great, unique design.
But before you get too fancy remember not to make too many repeated bends since the EL wire is delicate and easily broken.
A good hint is to use a simple contour or to leave a gap in the area of the shoulders, elbows, and knees to minimize the stretching and shrinking of the EL wire.
2. Now Make It
Once your design is done, outline it with pins or stickers on the garment. Better still draw an outline of your design. Mark the entry and exit points where the EL wire will go through to achieve the wanted effect.
This step will determine the needed length of EL wire required to light up your clothing. Make sure to measure the segments that will be hidden on the inside of the garment and add about 3 inches at the end of each piece of wire that will be stripped and soldered.
Remember that these junctions go inside the clothes.
3. Solder (if needed)
Got soldering skills? Assemble the components by yourself or better still buy pre-soldered EL glowing wire pieces, especially for simple designs.
Cut the needed length of EL wire for each piece of your design, remembering the extra inches required.
Solder the end of each piece of EL wire to a connector or double-conductor made of ribbon cable; remember that it must be long enough to reach the driver.
You can connect the EL wires by their copper center core or assemble the outer lines. Finish with a welding point, then heat the gun and touch the tubing covering the junction for a few seconds.
Join the pieces together and the conductors to the driver before moving onto the next step. Check that every piece of EL wire is correctly illuminated when switching on the batteries.
4. Sew It Together
Show everyone how handy you are and hand-sew your outfit.
Make a hole in the fabric at the starting point of your design, place the pocket with the driver inside the garment, making sure the connectors reach the hole.
Prevent the battery from falling out or bouncing by closing the pocket with a velcro or zipper. This will give you more confidence and freedom to make your best moves on the dance floor.
Gently pull the EL glowing wire through the starting point. Start sewing by making at least two stitches and pass the needle through the threads for a stronger knot.
Repeat this process every time you run the wire across holes across the solder junctions that go inside the garment, and across the endpoint.
Sew with diagonal stitches along the EL wire. A stitch for every inch will be enough for straight lines.
When sewing curves, make the stitches close together to ensure a stable design. You can also make a channel with a strip of sheer fabric contouring the design and slide the EL glowing wire through it.
You can sew the connectors and the wire pieces of the inside to the seams of your suit with bigger stitches.
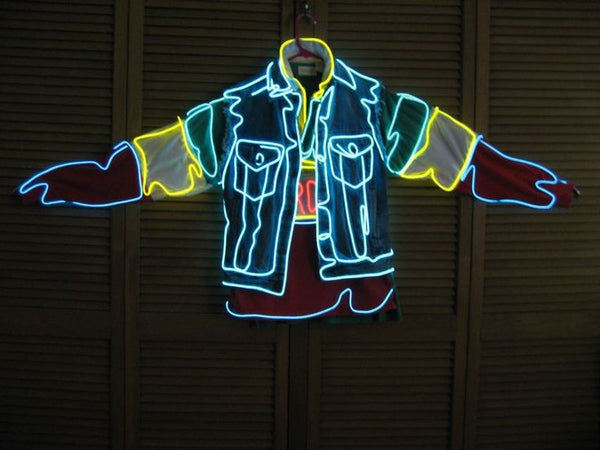
Now get ready to impress your friends when wearing your illuminated clothes.
Source: Tristen Savatier
Additional Tips
- When getting the EL glowing wire, you’ll find there are different thicknesses available; the best for this kind of project is the normal thickness, with a diameter of 2.3mm.
- Stick EL glowing wires with glue to light up accessories made of plastic such as helmets or glasses.
- Tie an extra knot occasionally in the fishing line, to avoid breaks, and so that the EL wire can remain in place.
- For one long piece along the arms or legs, leave about 2 or 3 inches running free at the end to allow your normal flexibility without breaking the wire. Also, leave about 2 inches at the end point of your design for the same reason.
