Instructions: How to make a hollow, wooden tetrahedron
.jpg)
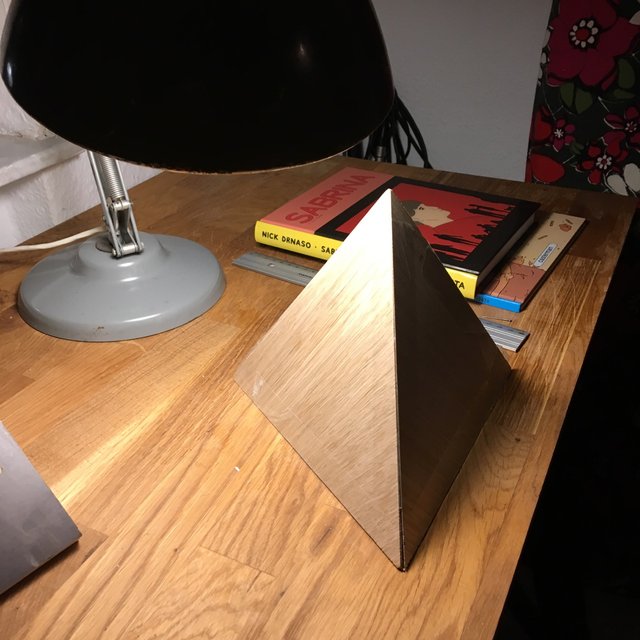
Given our current sociopolitical situation, the question on most people's lips is, "How can I make a hollow, wooden tetrahedron?" This post aims to address this question.
What is a tetrahedron?
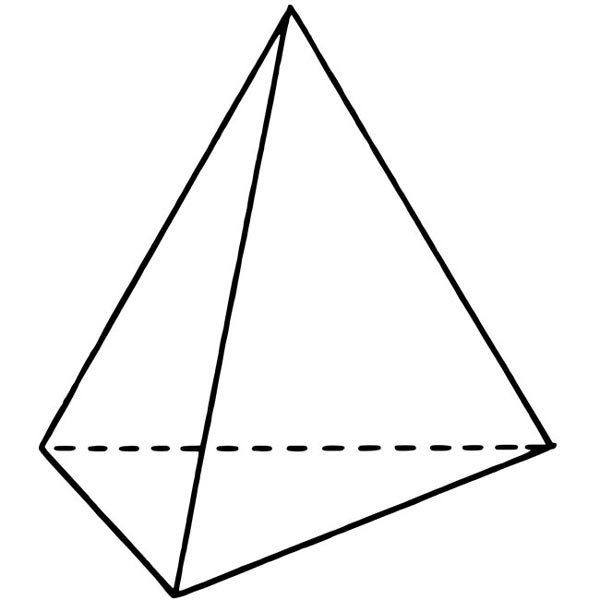
Strange that you should want to make one without knowing what it is, but let's cover the basics: A tetrahedron is a triangular pyramid. Regular pyramids (like the ones in Egypt) have a square base. However, a tetrahedron has a triangular base which is the same size and shape as all of its faces. The tetrahedron is the most basic geometric 3D-shape it is possible to create and some people believe that a derivation of this form represents a building block from which the geometry of our entire universe emanates.
A tetrahedron looks like this:
Make an angled jig
There are probably a hundred different ways to make a tetrahedron. I didn't take photographs of every step, so you'll have to imagine some of what I'm describing here. Obviously, this could be done using CNC-routing, but this method assumes you want to use a standard toolset. Here, I used a table saw. The tetrahedron we'll make here is 230mm on every length.
In this next photo, you can see that I've started making a jig to hold the triangular faces in place while I cut the mitres on the sides of each face. The magic number for this mitre cut is 35°. Cutting a mitre of 35° on each face will give you the face-to-face angle of a tetrahedron, which is 70°. Thank you to @lenskonig for essential numbers and additional engineering support for this project. Anyway, here is the jig nearly completed. And, yes, that is a Palomino Blackwing pencil. I carpent in style.
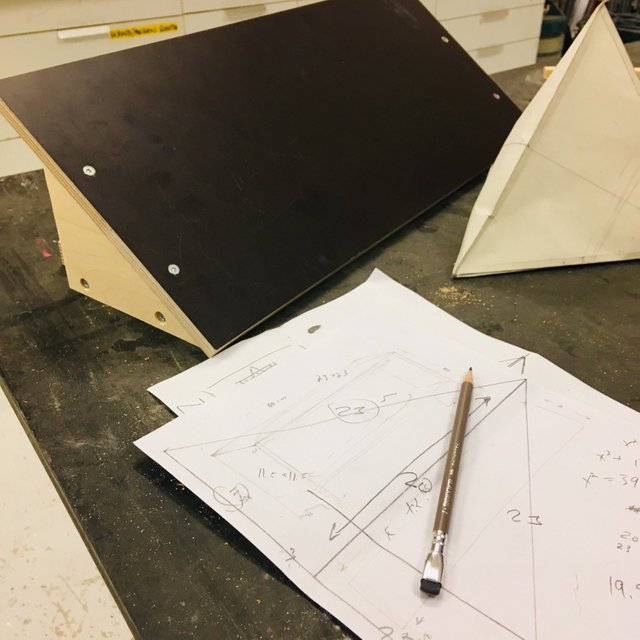
This jig was built from scrap offcuts I found around the workshop. It's angled at 35°. I realized later that to deliver a mitre of 35° I should actually have cut a jig at 55° (which would have positioned the wooden-faces at 35° off the vertical). However, this error was easily compensated for on the table saw by angling the blade at 20° to subtract the additional material (55°-20°=35°).
To summarize this step, build a jig that will deliver a mitre of 35°. If you're wondering why I built a jig instead of just running these pieces down the guide on the tablesaw, there are two reasons. First, I don't want my fingers that close to the blade. Second thing, I wanted to be able to make many tetrahedrons and hold a tetrahedron party. For this, I needed to stabalize as many variables as possible. The jig gives consistent results and can produce multiple faces of exactly the same size.
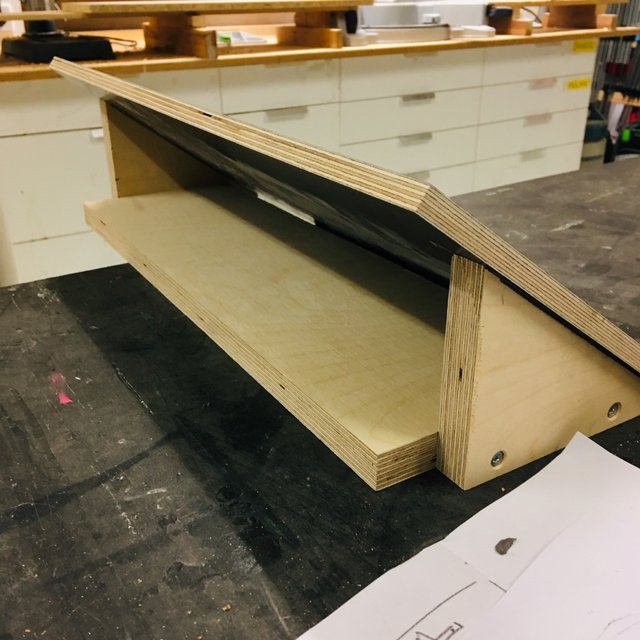
The back edge of the jig (the edge facing you in this photo), will be the edge that is run along the guide on the table saw:
Align a face, ready to cut
I cut a test face and then clamped it to the jig and aligned the lower edge, so it was positioned correctly through contact with the 'floor' — in this case, a piece of wood which is standing-in for the 'table' of the table saw:
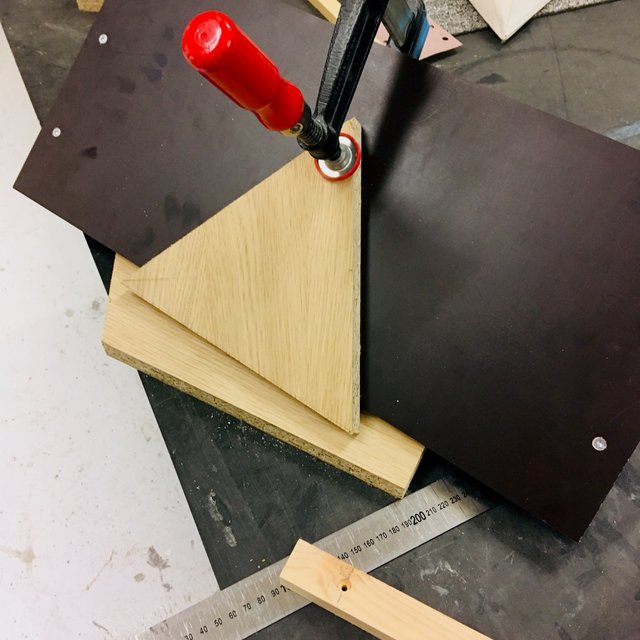
Once that was clamped accurately in place, it was possible to add permanent stop-blocks to the jig. These will ensure that future triangles placed in the jig will align as accurately as this one:
Now we'll add a makeshift clamp to hold the pieces in place as they're run through the table saw:
Mitre the edges
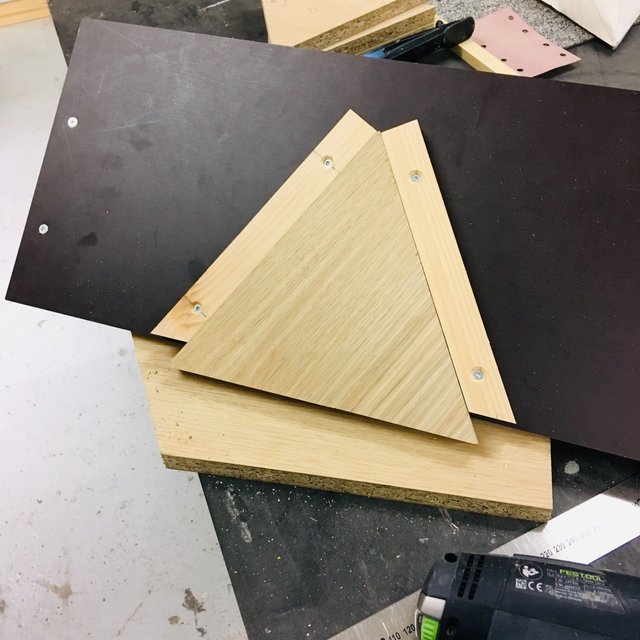
In this next photo, you'll see I've mitred two edges on a face using the jig, and I'm about to go back and mitre the final edge (the lowest one).
You'll notice I'm using a scrappy chipboard veneer. This is because this is my first tetrahedron and this was the least valuable wood lying around. When I make more tetrahedrons, I'll be using a solid wood.
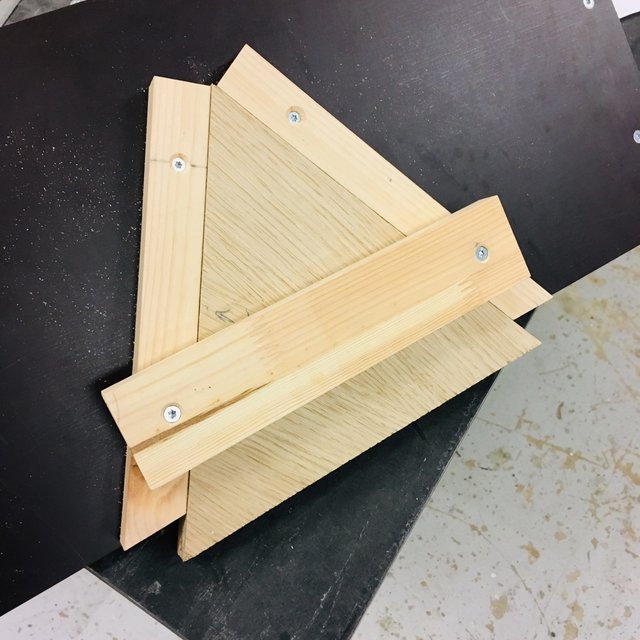
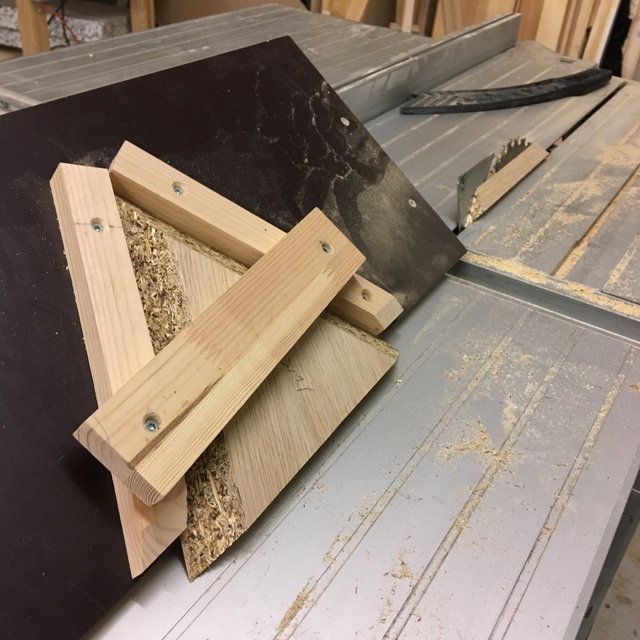
Okay, here's all the faces cut and ready to assemble:
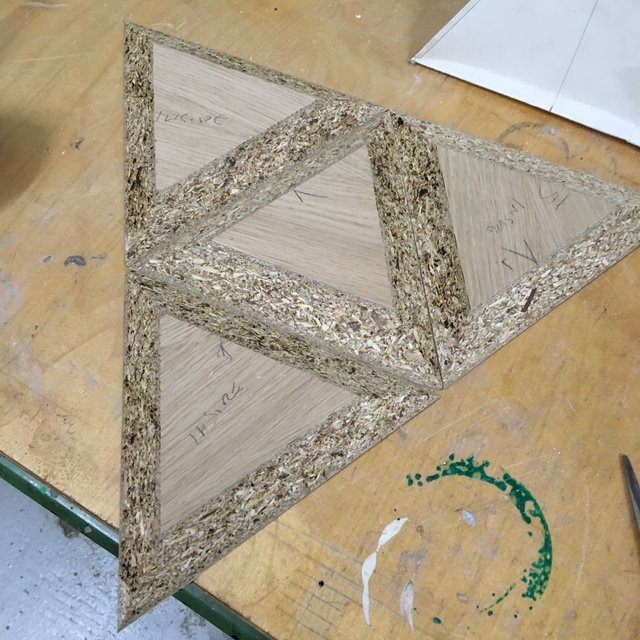
And here's the finished prototype. It's a bit scrappy because I got some cuts slightly wrong in the first try, but this was a calibration-run. Now everything's set up accurately with the jig and I'm ready to make some beautiful tetrahedrons using proper materials. Chipboard veneer is pointless as a final material for this type of project (it has almost no tolerance for reshaping) but it saved me damaging more valuable material during this test phase.
Thanks for reading. Good luck in making your own tetrahedron.
This is hot, and I miss European plywood. US standard is three plies with veneer skin. Very confused; is it meant for stability or to be seen? Why hide the face and skimp on the edge? A perfect material wrecked by Uncle Sam.
Your Mid is good. How was the gluing up?
I'm not sure about US ply.
@ lenskonig I'm hoping to work in bamboo.
Probably moving over to CNC as well. But this will be a learning curve. My plan is to avoid using any glue.
Riddle me that.
Bamboo is held together with glue. Good luck with no glue. I can't imagine a way but maybe you can.
I am still lmao!
This post is as hillarious as is it helpful. My favorite article this month!
Thank you for reading, @mayb
Glad you enjoyed it :)