
These are detailed instructions on how to make a trough planter out of hypertufa mix. Hypertufa is a cement like material that is much lighter in weight than regular concrete, made using Portland Cement, perlite and peat moss. We have made several of these containers over the years and find them delightfully fun to plant up with all sorts of things. Click here to see a post about them, one of our earliest stories. In the making of yet another trough, in order to write this post and have plenty of photos to help those who learn better by seeing rather than reading the words, a huge error was made. Determination and preserverance along with a strong stubborn streak gives this story a happy ending, however. And now, let’s get to it.



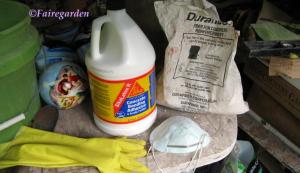
First gather up your ingredients. No, check that. First, figure out a good place to do this project. It helps if you can stand up fairly straight, to save your back. I have an old metal topped table under the garage deck that is the home to all projects involving concrete products among other hobbies. Gather your supplies. For this project, 1 and 1/2 bags of perlite and an equal amount of spaghnum peat moss, found at a big box home improvement store in the house plant section will be needed. An equal amount of Portland cement will be used. That is the ratio, for whatever size trough. It must be Portland Cement, not mortar or concrete mix. Sadly, where I live the cement is only available in ninety-four pound bags. It is kept in a wheelbarrow in the garage. This must not get wet or it will harden rock solid. You should have a mask, for the cement is like dust and flies all over the place, especially up your nose and into your lungs. No to that. You need some latex type gloves. The Financier bought these instead of the clear package of ten that was on the shopping list, and I like them much better for they are longer and stay up better while working with the wet stuff. A bottle of concrete bonding agent is always used here to add strength to the projects, same with the fibermesh. The cement and bonding agent can be found at the same big box store. The fibermesh was found at a concrete establishment that used to be near my house. I asked if they would sell me a small quantity and they gave me the bag. Everything should be assembled ahead of time because once you begin, you need to go start to finish before the mix starts to harden.

Choose your forms. These can be any shape. I have used cardboard boxes, plastic nursery pots, plastic underbed tubs and even forms made from lumber. Today we chose a large plastic tub for the outer form and a metal box for the inside. You need the wall thickness to be two to three inches thick for strength. I have fudged a little bit on this with the thickness being somewhat less than desired and paid the price later on.
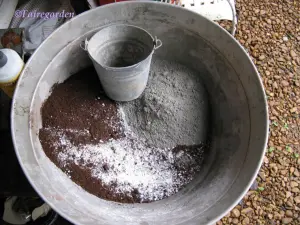
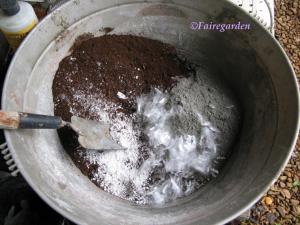
Time to begin mixing. A plastic tub from Big Lots is used for mixing. A long handled garden trowel, also from Big Lots is the mixing tool. I first add the cement, breaking apart any lumps, then the perlite and peat moss. Combine these dry ingredients well. Then add a small handful of the fibermesh, cut up and spread apart. If you cannot find this stuff, it can be omitted, but your project may crack and fall apart if left out in freezing temps. All of the projects we have done have been left outside in the elements for several years with no breakage. The mesh works magic.

Time to add the liquid. I use an equal amount of bonding agent and water, sort of, with more water added to make it the right consistency. I add about one cup of bonding agent, an equal amount of water and begin stirring. It is better to add more water a little at a time until you get the consistency desired. Too wet is not good, but too dry will not work well either. Oatmeal has been mentioned as to what you are looking for, but I like it a little drier than that since I make oatmeal a little runny. Make sure all the dry ingredients have been well wetted, like making a cake or brownies.

This is what your mix should look like. It should hold together in your gloved hand with a little pressure. The fibers can be seen mixed in nicely. It should be mentioned that trying to take pictures of this procedure without getting concrete or other stuff on the camera is quite difficult. Onward.

Line your form with plastic sheeting and tape into place. If there is writing on the plastic, have that facing the tub or it will imprint onto your project. Using the plastic allows for easy removal when it is time to unmold your trough. Do not skip this step. Some of the garden jumped into the background, photo-bombing!

Begin filling the plastic lined tub with the hypertufa mixture. I made this project about two inches deep, using plastic wine corks to help with the depth in addition to making the drainage holes necessary for the finished trough. A third cork was added in the middle after this photo was taken. I pushed the corks in well with a circular motion so the bottom of the cork was sitting on the bottom of the tub used as the form. After the trough is unmolded, you will remove the corks by pushing them out. I did not do this, but wrapping the cork in plastic wrap could help the removal process. It is sometimes difficult to find exactly where the corks are located when unmolding after the hardening process. I turn the whole thing upside down, very carefully and scrape away the cement where I think the corks are, then push them out.


It is now time to add the inner form. This is the crucial error that I made this time. The metal box was not wrapped in plastic like it should have been. Do not do what I did. Wrap the inner form in plastic. Please.

Onward with 20/20 hindsight. Place the plastic wrapped, not the naked inner form as shown above, on top of the hypertufa mixture, centering it. Use something heavy inside the form to hold it in place, for as you add mixture down the sides it is easy to push the inner form around. Try not to move it at all, to keep it centered. Also, you do not want the inner form to float up as the mixture can sometimes get underneath it if there is too much water in it likes mine always has. Every single time. Begin adding the mix all the way around. This can be difficult if you have not allowed enough space between the inner and outer forms, like I usually do. I used all the mixture and could have made more at this point, except I was out of all of the ingredients.
 The project should now be covered in plastic to dry slowly. I always do the concrete projects in the summer, when it is too hot to garden. Too cold and the cement will have trouble setting up. Too hot can be a problem as well, for the cement should not dry too quickly. Wrap plastic around the entire thing and let it dry and harden in the shade for several days.

Time for the big reveal. Remove the plastic from the top and check to see that the cement is rock hard. If it is hard, you can unmold the trough. Even though the cement feels hard to the touch, the project is still quite fragile and care must be taken when removing it from the forms. Turn the tub upside down. I did it on the ground, out of the way, in the place it would be curing. After being unmolded it will need to cure for several weeks and complete the hardening process, again wrapped loosely in plastic. The plastic tub came off easily and the plastic wrap was gently pulled off. The outer surface can be roughed up with a metal brush at this time, carefully, to remove some of the impressions made by the plastic and give it an aged appearance. Immediately I saw that no plastic had been taped to the metal box. Uh oh. Try as I might, the metal box was not coming out. Finally I was able to get it out, with the help of a hammer, but…

One side of the trough broke off. This happens sometimes, and we have been able to salvage the project with the use of cement glue. We glued it and used a bungee cord to hold it in place. But, the glue was defective and seemed to be sort of like putty, never getting hard even after the curing process of several more weeks was allowed. Boo.

But we did not give up. The putty stuff was scraped off and we tried another type of glue, this time something called Gorilla Glue, that was waterproof. It was applied to both the body of the trough and the broken off side while the project was standing up on end. The broken off piece was carefully pressed into place and a heavy rock was placed on top to help hold it in place while the glue dried. The Gorilla Glue expanded like that spray foam insulation to fill in the spaces of hypertufa well. Some of the foamy stuff seeped to the outside and was cut off. It was dry in a couple of hours, happily, so we could proceed. Old concrete blocks were used as a base, being careful to leave the drainage holes open underneath. We rubbed dirt all over the project to give some instant age to it. It was now ready to plant, the fun part!
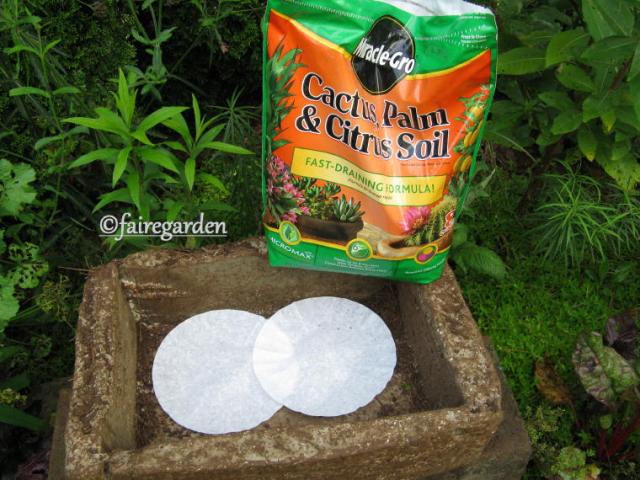
Coffee filters were placed oved the drainage holes that were made by the wine corks. Cactus mix was used to fill the planter. This trough will be in a full sun position and appropriate plantings were taken from the garden, using small bits and pieces.

Some bronze Carex ssp. were borrowed from the grass waterfall, some Helictotrichon sempervirens ‘Sapphire’ was borrowed from another planter, some Orostachys iwarenge was borrowed from yet another spot and some hens and chicks were lifted from some hanging wire baskets. Pea gravel was borrowed from the Zen Garden and a nice looking found rock completes the vignette. From having just been planted, it looks pretty good, I’d say.
***
So there you go, dear readers. The detailed account of the making of a hypertufa trough has been posted to help you in making one yourself. A previous post about making hypertufa balls, with some of those photos and text used in this story, can be viewed by clicking here-How To Make Hypertufa Concrete Balls. There are more steps involved for the troughs so be sure to allow plenty of time to do it right. Be sure and use plenty of plastic wrapping on the forms, too. The breakage was included in this post to show you that it can still be salvaged if that happens. I hope you enjoy making and even better, planting and replanting your hypertufa trough. Endless opportunities await.
For other How To posts written by Fairegarden, look for How To on the sidebar page listing or click here.
Frances


Oh my gosh. You are an inspiration Frances. I see a weekend project coming on.
Thanks, Frances, for all the info! Besides wanting planters, I’m also considering a semi-submurged sculpture for one of my projects… hopefully it won’t be 100 years before I can report on it! This will be carefully filed away and will be a great help! Jack
Frances, What a wonderful how-to! Now I must get on it and make my own…xoxoGail
An excellent tutorial, Frances! You have thought of every step and every question a person might have. I’m sorry about the struggle with the inner container, but even that mistake provides a very good lesson for all of us trying this for the first time.
This is something I’ve wanted to try for quite awhile. I did make a couple of concrete stepping stones–ones from a kit–with two of the grandkids a few weeks ago. It was my first foray at mixing concrete, and I discovered it wasn’t as simple as I thought. When I do attempt some hypertufa, my first project is going to be a small one:)
P.S. I do hope I can find Portland Cement in smaller bags!
Great job on both execution of the planter and the detailed instructions that anyone can follow. I’m paralyzed now so making such a project is but a dream but watching it made was so much fun.
Best, Patrick
One of these days…..I really like hypertufa containers and NEED to put one together. Great tutorial.
Yayayaya! I know what I’m making next… mwahahaha.
I do have a question though… to make these, since I live in an area with volatile weather, could it be possible that it would set properly if in a nice non-heated/non-cooled basement that normally is about in the mid 70’s with low humidity? It may just need to set longer, I imagine…
[I ask because that’s the only place I could do this project without my boyfriend yelling at me for the mess… hee hee.]
And now to source some plastic wine corks… maybe I should buy some booze. Yeah, that’s the answer.
Nice job!! My Garden Club did this project years ago. Most of the items you need come in large bags, so get some friends together and use it all up. We used “bird netting” instead of the fiber mesh and chicken grit (sold at the local co-op) instead of the Perlite. If the netting shows up…just burn it off. The chicken grit has ground shells in it…so it leaves a nice textured finish. Most of the members used cheap foam coolers as the form, which just got ripped off. We went a step further and rubbed a mixture of buttermilk and moss on, which gives a wonderful aged look. I still have mine, it has to be 15 yrs old and still looks great.
Thank you for writing this and having the steps so well defined. I made the mistake of using printed plastic on a fairy house and had to be creative to fix it. Good to know gorilla glue works on hypertufa! It is great stuff although I have really stained my hands with it…those gloves would have been a good idea.
This is a project that I would really like to try! I visited a garden in north Georgia in early June that had several of these planted with miniature hosta. Thanks for the how to
I have wanted to try hypertufa and now I have some great instructions…will have to give it a try.
Wow, great instructions! It turned out wonderfully. Good to know about the Gorilla Glue. Thanks!
Great tutorial. My husband and I try to make a few every year. Just did two pieces I blogged about. LOVE making them!!!
Thanks for the detailed instructions, Frances. Your creations are wonderful. I would love to try this someday but meanwhile I have a new found appreciation for the prices on the ones I see for sale. That’s a lot of work, however enjoyable.
Reblogged this on Succulent Bromeliads plus.
In Denver COlorado it gets down to -10 degrees. How do I keep plants alive over the winter in
my hypertufa containers? Thanks for any help. Multiple solutions welcome.
Pingback: Foliage Day-It’s Everywhere! « Fairegarden
Pingback: Love October Foliage Day « Fairegarden
Pingback: Planting a Winter Container « Fairegarden
Where can you get the fibermesh? I live in Richmond,VA and know of no place around here that does cement.
Pingback: What Looks Good Now-Early September 2013 | Fairegarden
I’m considering making a hypertufa shower base for the bath in our rustic cabin. The shower gets infrequent use, and the rough look will fit nicely. Any reason not to pursue this route? The base I envision will be round, approx. 30″ in diameter, with sides approx. 14-18″ tall. A circular shower curtain will provide “walls” on all sides. Any insights appreciated!