I am new to joining and posting in this forum but have come upon various threads of rebuilds on this and other forums throughout the years and always thoroughly enjoyed reading them. I figured I’d repay some of the entertainment and knowledge I got from them by creating my own. I hope you enjoy.
I'm definitely no expert and I’m sure there will be some mistakes along the way, feel free to let me know if you have some advice or information that will be helpful, I’m always happy to hear that kind of stuff.
I didn’t plan on doing a total rebuild, but things kind of snowballed on me as more and more issues were revealed until I decided ‘to hell with it’ and went down the dangerous path that either ends in a rebuilt bike or a discounted basket case for sale.
- THE BACKSTORY:
I bought a 1985 FXWG from my neighbor about six months ago or so. He’d owned it for a lot of years and bought it from the original owner back in the early 90’s. He rode the heck out of it for a while, then as he and the wife got older it just sat. It was giving him a hard time getting started and he thought it was a dead battery, dirty carb, and needing a tuneup.
He probably circled the neighborhood with it twice in the past five years since I’ve lived here so I knew it HAD been a reliable running bike but had just not been ridden, and he handed over a stack of maintenance and repair receipts with it. I was pretty pumped.
He had it repainted many years ago by someone who did a kind of cool red metal flake job with ghost flames. It is pretty rad but is showing a good amount of its age, bubbling around the filler necks and some chips and nicks. Not a priority but I think a repaint is in the future.
So I messed around with this thing in my (very minimal) spare time. I wasn’t in a hurry so lots of time went by without much activity on it. I’ve got a bunch of other projects anyway. Plus, with a new kid and pregnant wife with number two I’m lucky to sneak off for twenty minutes during nap time.
Threw a battery in it, replaced the carb (which was a replacement cv that was dirty and corroded) with an S&S, new throttle cables, new spark plugs, some fresh oil. Got it to start and went around the block with it. All seemed fine, it just ran kind of sluggish and I figured it needed a little more adjustment on the float level and some other odds and ends.
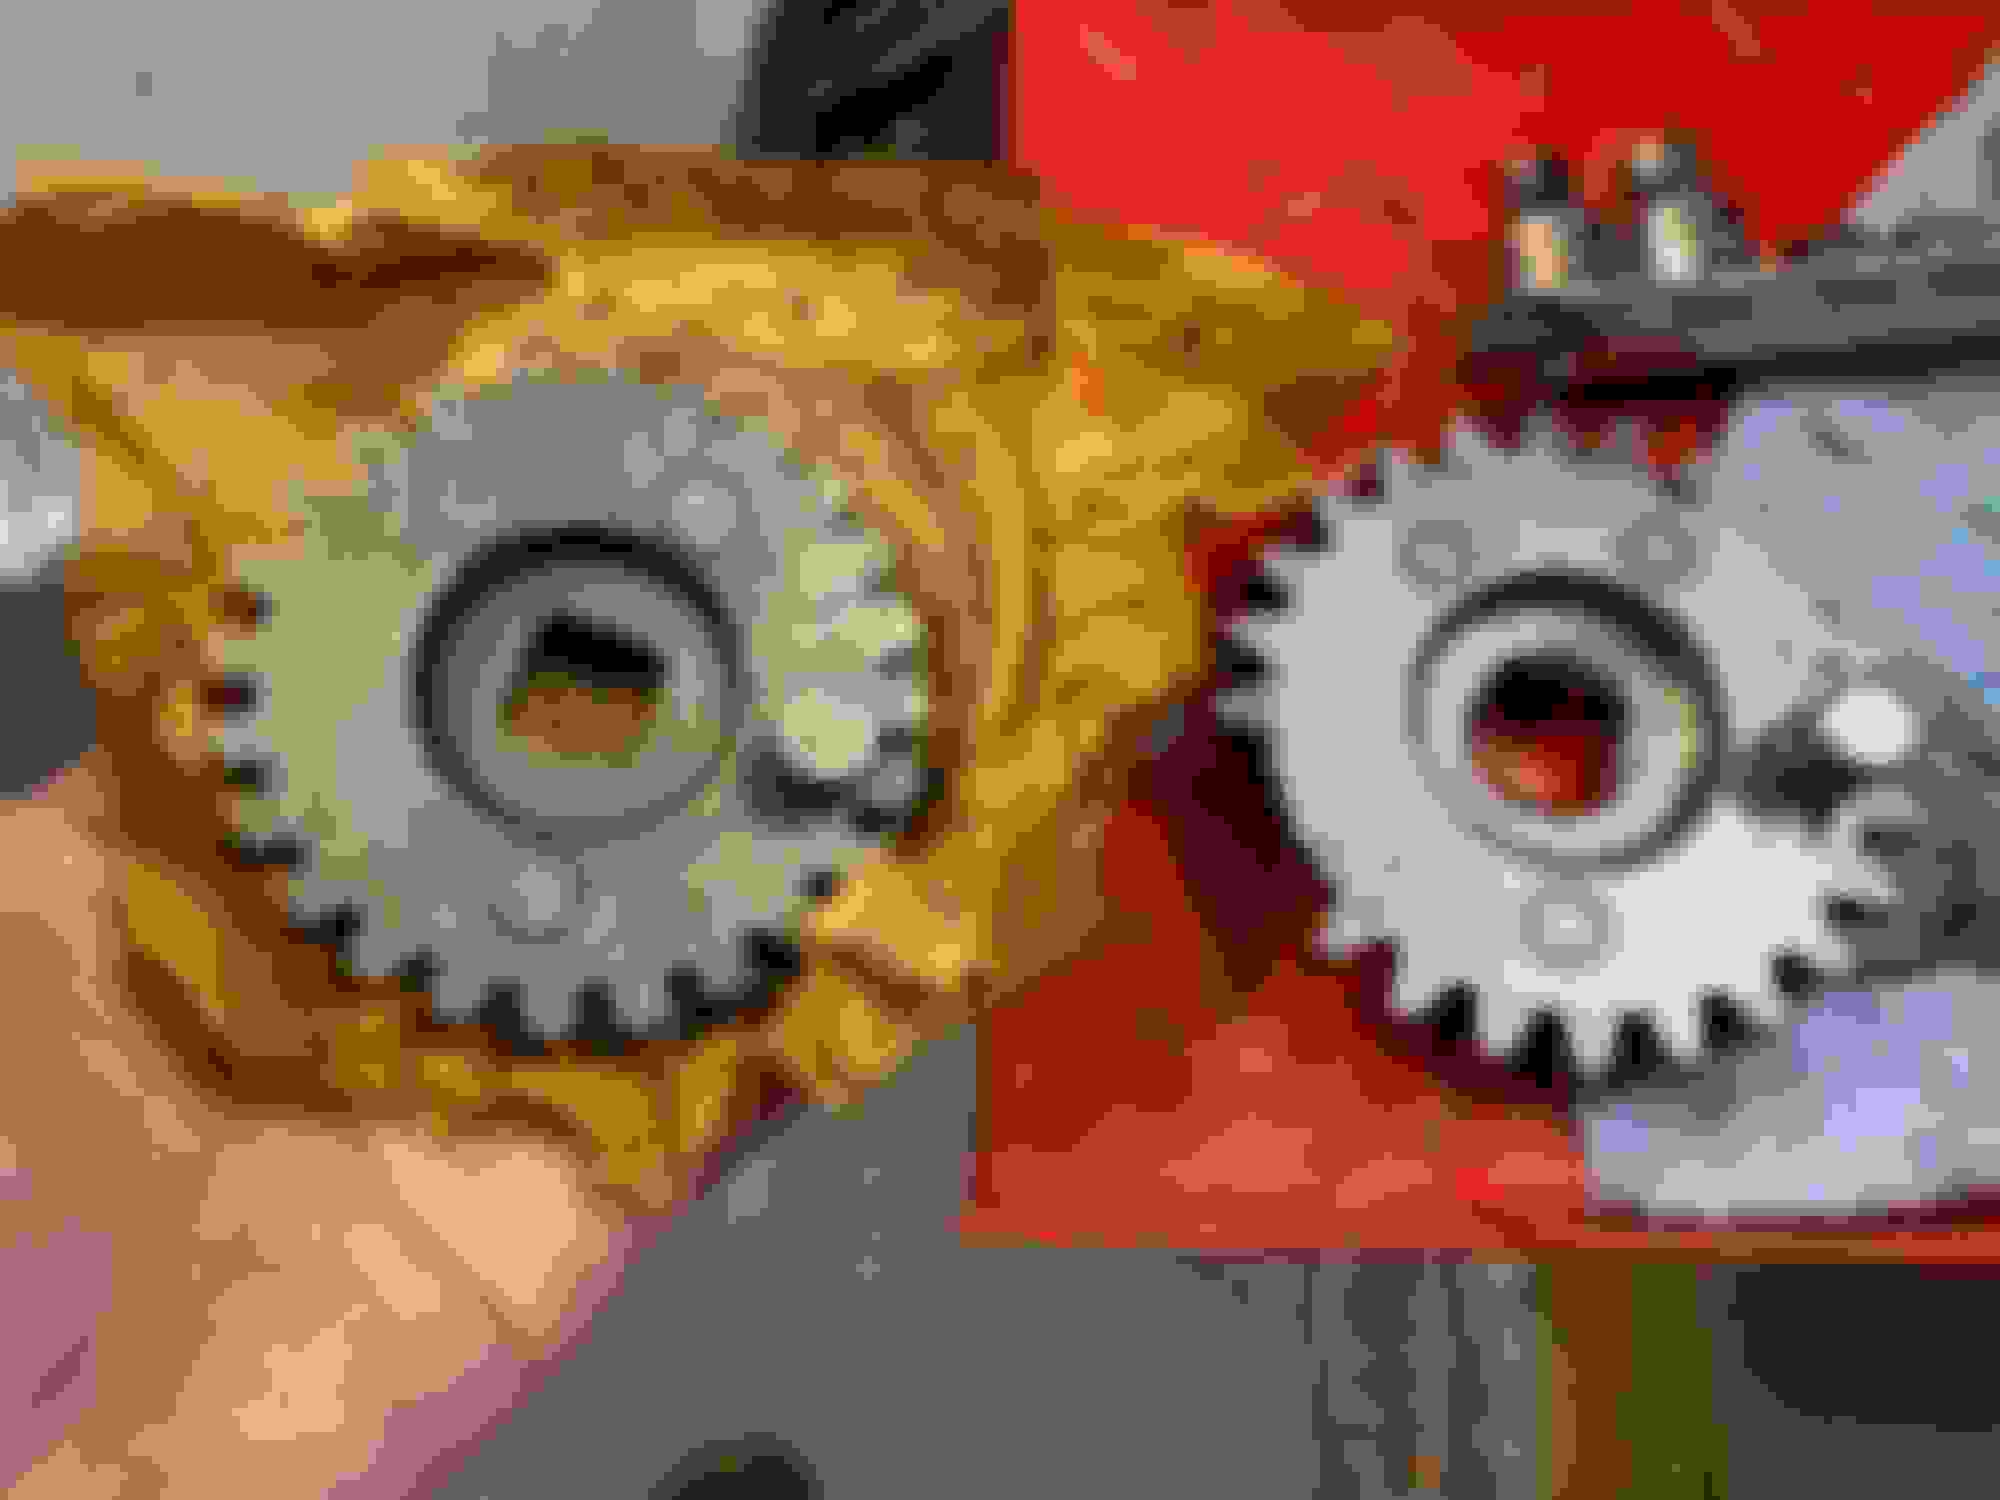
I replaced the kicker gear to solve the skipping pedal. Found two teeth broken off the old one.
Someone must have gotten rough trying to start this poor fella at some point.
Also check out how ugly the right side frame and swingarm are under the battery. All that acid over the years did a number. So now I’m already thinking if slapping some rust oleum is the solution or pull everything and blast and powder-coat the frame. Hmmm, stay tuned.
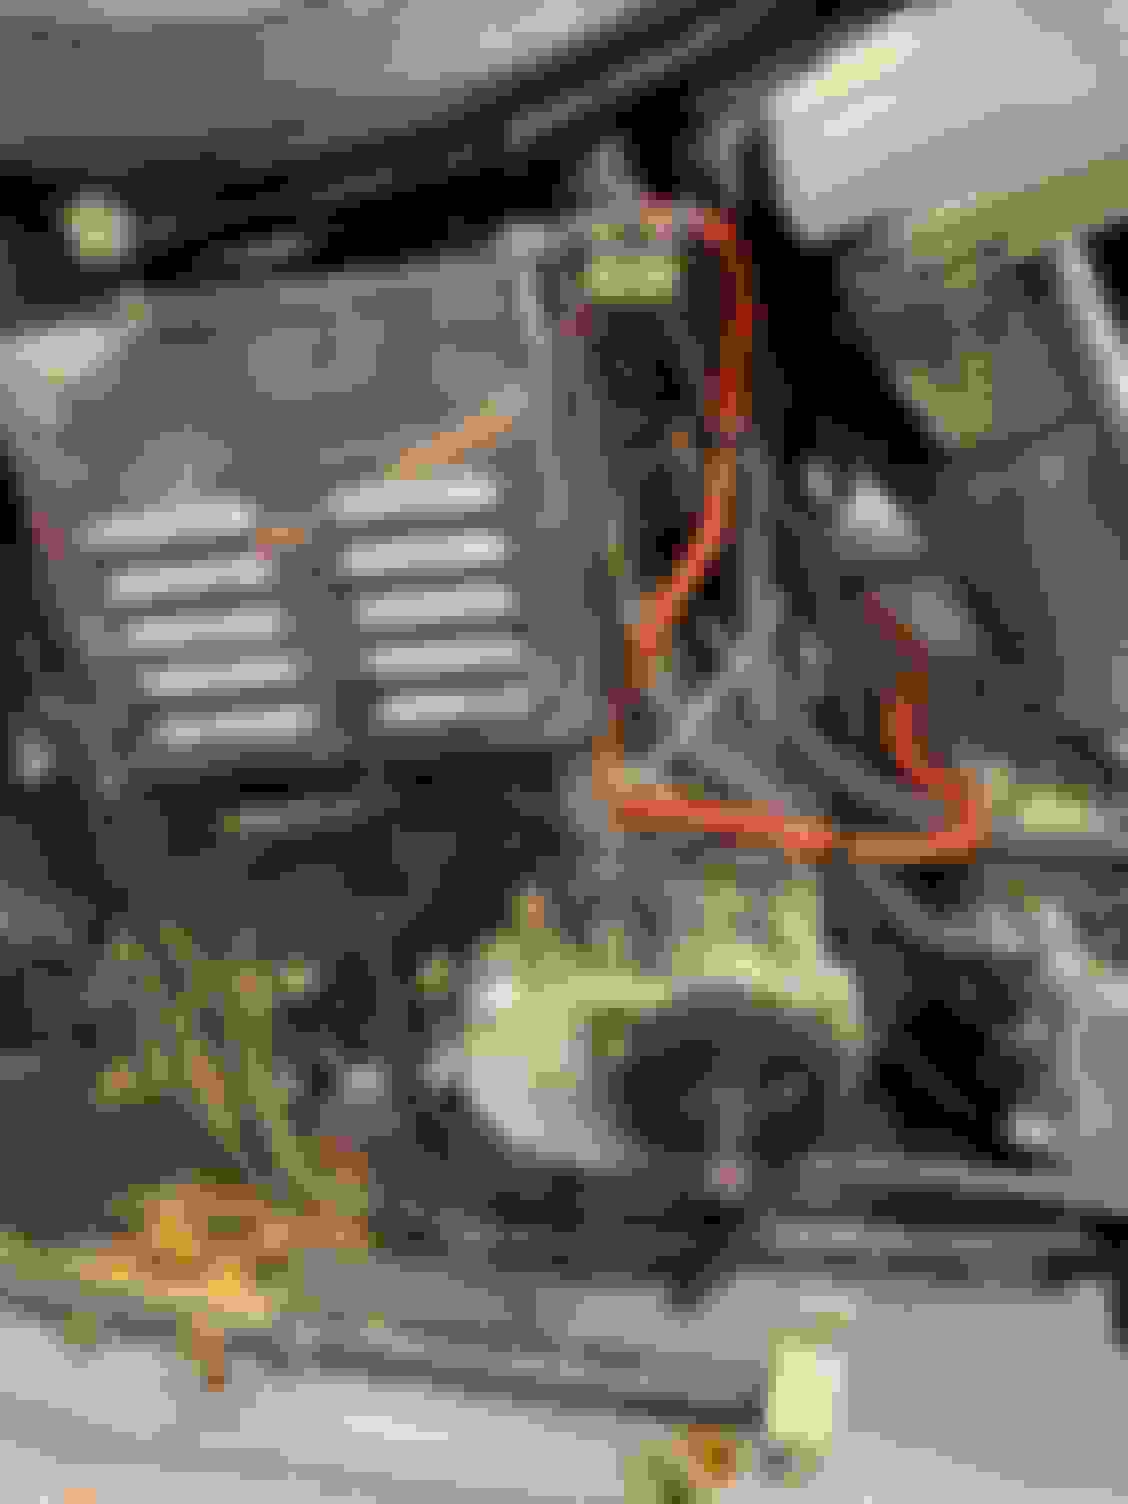
In opening the derby cover to back off the clutch tension for the kicker repair I discovered it was full of oil. Ok so then I start to pull everything off to replace the gear shaft side engine seal.
Took two tries to get the right clutch puller for this bike. The good news is now I think I have the right tools to do anything from 38-01. Lol
This was fun to take apart as long as I didn’t think about how I was going to get it back together again.
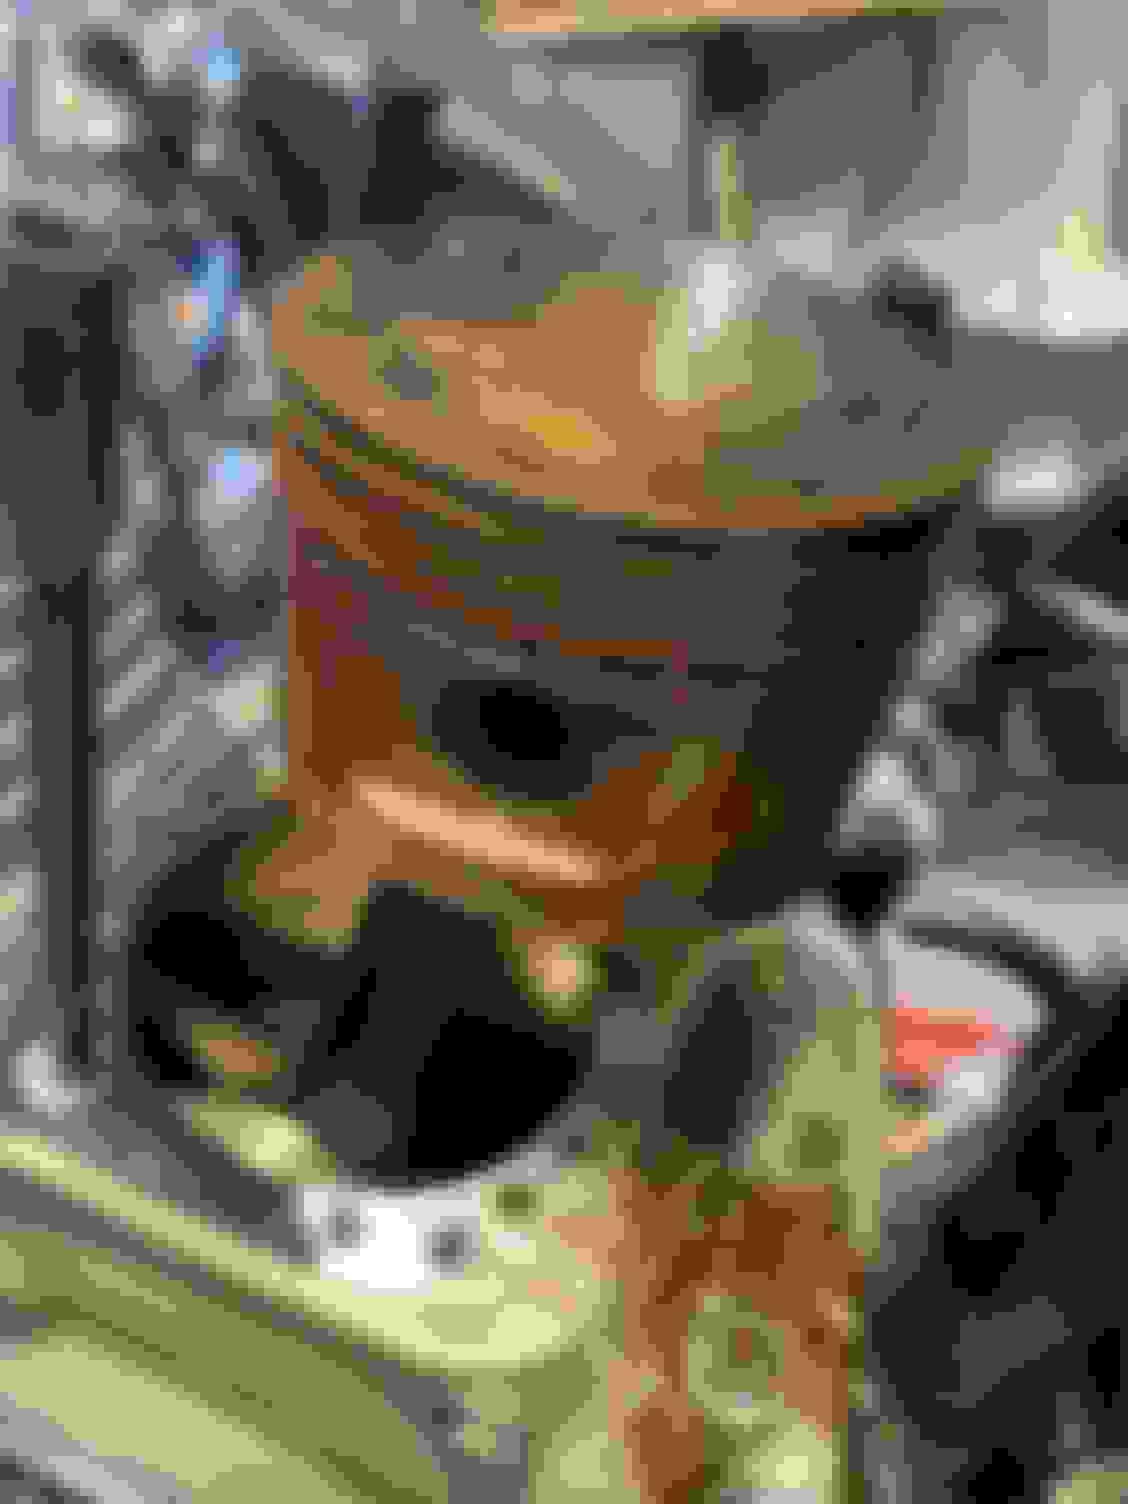
I pressed the new seal in and realized the crank wasn’t moving at all. I posted in this forum about it, called crank won’t budge after seal replacement. Long story short, rear piston was stuck in the cylinder. Theory is that after sitting for years with a valve open (I live a quarter mile from the ocean and have never seen things corrode so fast in my life) there was a bunch of corrosion around the rear rings that got them stuck and the piston jammed up from all the crud and rust.
So I started stripping everything down at this point so that I have some more access to the motor.
pulled the oil pump and opened the gear case to see if there was anything blocking movement there. Nothing so simple.
Check out that ugly rear cylinder.
The grimy, offending piston with its jammed up rings. Took a block of wood and big hammer to get it out of the bore. So I feel kind of stupid for thinking I could just fire this bike up and get it running with an evolving tune up list. Hindsight and all says I should have been more careful and either squirted oil into the cylinders or pulled the heads to inspect. But I guess no harm here since I’d be in the same situation either way. A little oil wasn’t going to fix that piston. I’m happy to hear any thoughts on this. I’ve never had an issue getting a bike that’s sat for a few years to fire up with some fresh gas and oil but maybe I’ve just been rolling the dice all these years?
So here I decided that I needed to do a complete tear down to make sure I could put eyes on everything and make sure I didn’t either have anything bent or broken, any further rust or corrosion that would be a problem, or any bits of metal floating around anywhere.
I’m getting you all caught up on some past progress so hopefully the next few updates will be fast and interesting.
Get ready for a great learning experience! I tore my shovel down to the frame and rebuilt back up. If you haven't already I recommend lot's of containers for storing parts. Large freezer ziploc bags that you can label with a sharpie. Stay organized and good luck. I'll be watching as you go and post your progress.
Alrighty, so now that I made the decision to do a full teardown and rebuild I started the process of reviewing the service manual (well, Clymer manual that is…almost as good as a factory manual hopefully) to see what special tools I’d need and begin sourcing them, trying to understand the process as best I could, and predicting what parts I’d need so I could start ordering things.
It always feels like when I’m working on a bike I waste weeks ordering a part, waiting a week for it to ship, then discovering I need something else or something different and doing the whole wait over again. I get ‘weeked’ to death and before I know it a year has gone by. So this time I’m hoping to get ahead of that a little bit.
Okay, so back to the fun stuff. After pulling the heads and jugs I’m down to a fairly grimy looking lower end.
Full confession here, there is a big part of me that’s really excited for a teardown simply for the excuse to give everything a super thorough cleaning. Don’t get me wrong, there’s the mechanical opportunity to inspect and replace any problems, but I do love a clean motor and hopefully I end up with something that looks close to new when I’m done.
I’ve got old style cylinder studs on this, and one of the rear has a helicoil in it. I’m nervous about trying to replace them in 40 something year old aluminum. Is it smart to replace with newer style or leave them as is? I skimmed the manual and found nothing, and Donny Petersens Performancing the Evo book didn’t have anything that I’ve found yet as far as advice.
All the top end stuff lined up nicely waiting for more review and cleaning. I don’t have a lot of experience with valve work although I do have a valve clamp so I’ll do some reading and tear into the heads soon.
I’ve got a buddy who said he’s got an extra set of pistons and jugs so I’m going to see what they look like. Otherwise I’ll get these bored and go oversize. Pretty sure this motor is still stock bore. I haven’t checked the pistons for markings yet or taken any measurements.
I’ve always wanted a motor stand since I’ve got another evo needing a rebuild and a shovel I may end up tearing into next. Grabbed this one for not a lot of money on amazon. It’s an extra tall one which works out perfectly for fitting an old baking pan underneath to catch all the oil.
Took a few measurements before splitting the cases. I grabbed a cheap dial indicator and gave it my best shot. My readings were fairly consistent so I think I did everything correctly (within reason). Biggest thing I tried to do is set the dial plunger perpendicular to the measurement, whether runout or end play.
Assuming my technique and equipment were both up to snuff, end play came back at around .002” to .003” on the pinion shaft. From what I can find this is right on target (my manual provides .001 to .005 as range). Runout was close to .012” on the sprocket side shaft end and .003” to .004” on the pinion side shaft end. I suspect the sprocket side number was partly elevated because I was attempting to read on the threads at the end of the crank.
Consensus seems to be that these numbers are the high end of ideal, or even out of spec, but within the evolving limits from HD. Seems like every few years the MoCo increases the ranges? I’m not too worried since this isn’t a mystery crank, but one that was in a bike that ran reliably for a lot of years. Happy to hear thoughts on this though.
After splitting the cases and inspecting the right side case. I’m not too experienced with inspecting bearings and bushing surfaces but this looks pretty good to me. Looks like I’ve got a newer cam bearing in there too, although it sounds a little gritty when I spin it. Pretty sure I’m going to replace it just to be safe.
I haven’t made any firm decisions yet regarding upgrades, but I’m debating a mild upgraded cam when this goes back together. I probably wouldn’t do much more than cam, tappet/pushrods, carb, and exhaust if I can find one (it’s got old drag pipes on it now which I’m sure doesn’t help things).
The heart of the beast. Good news is at this stage I don’t see anything obviously wrong. Hard to tell but the bearings on this side look good and tight to me. Slight lateral movement of the cage but no radial movement that I can detect.
I’ll be taking a bunch of measurements shortly on the crank, including wrist pin bushing play, lateral play of the rods, etc.
Get ready for a great learning experience! I tore my shovel down to the frame and rebuilt back up. If you haven't already I recommend lot's of containers for storing parts. Large freezer ziploc bags that you can label with a sharpie. Stay organized and good luck. I'll be watching as you go and post your progress.
Yeah I’m definitely a fan of the ziplock and sharpie move!
Ok so engine teardown continues. Found an excuse to pick up a shop press. Manual says to press the flywheel (crank?) out of the left side case and NOT to use a hammer. Wow, it’s like whoever wrote this manual knew what my younger self would try and do.
So a trip to HF to pick out a press, they have a 12 ton or a 20 ton. Ultimately came down to how much shop space I’m willing to commit to a once a year tool. Went with the 12 ton. Happy to report after a few quick pumps it was done!
For those that haven’t done this, it’s kind of terrifying. You build pressure until the point that you are sure your old, brittle, fatigued cases are going to shatter, and then it lets go with a loud ringing “CLANG!” A few more quieter clunks and it’s out. I removed the flywheel and set the case back down to get a picture. Pulled the outer bearing out of that side and think it’s probably beyond what I’d like to have in my engine. It’s just got a little more wiggle side to side than I like to see. Unless I’m being silly and the cages always have a little slop to them? Inner and outer are similar. I’m not sure how to measure a bearing really, but if I secure the inner part the cage is able to move laterally about a rough 10-20 thousandths.
I know the bearings and bushings are a package deal so I’m going to look into new ones I think. Also, check out what the last guy to work on the bike did…
See those ugly screwdriver marks from trying to pry out the old seal? That wasn’t me, but I suspect it’s the reason the seal was leaking when I got this bike. So now I need to figure out what to do about it. Maybe some light sanding to smooth it out would be enough? I don’t want to make the opening any larger if possible. I’ve read that some people use some type of jb weld with good success although I’m skeptical about the longevity.
So while the motor got to sit in its new stand the frame was left on the lift looking pretty ragged. There was a good amount of corrosion with previous touch ups that weren’t holding up too well so it looked pretty terrible up close. With more stuff pulled off the chassis the corrosion became more obvious and I could see it was a lot more widespread than I initially thought. Nothing really problematic, but not as nice as I want this thing to look. So I decided to pull it all apart and get the frame powder coated. There’s a local guy who did an FXR and a Sporty frame for me and they came out pretty awesome so I’m psyched to do this one too.
Looking a few pounds lighter on the lift. I’ve come this far I can’t just put it back together as is. There’s kind of not much more to it, besides I should probably check the neck and swingarm bearings anyway.
So the trans came out pretty quickly and will get a decent review later, The brakes look pretty tired so I’m glad to get the whole system off to go through a thorough refresh. The wiring harness looked pretty decent and reasonably intact, but there were a few spots that I didn’t like the look of what a prior mechanic had done, scotch blocks and electrical tape twisted together wires from what I assume was a turn signal delete and possibly some other minor stuff, so I’ll be trying to clean that up as well.
Yanked the forks and swingarm and got down to the skeleton. I had to wait for a drift and neck cup removing tool to arrive since I wasn’t getting anywhere with gentler methods and I didn’t want to tear anything up. Once they showed up I was done in just a few minutes.
Loaded in my truck on the way to the powder coater. Snapped a few pictures of some of the condition. I’ve seen worse corrosion on a frame but it was an old ss-250 that had sat behind someone’s shed for thirty years.
Should have the frame back in a week and I’ll post some before and after pictures. I always love how good a frame looks after it gets coated.
 05-21-2022, 08:08 AM