

Introduction: How to Make a Leather Camera Strap W/ Useful Accessories!


Today we’re going to make a leather camera strap with quick release links, a detachable wet formed lens cap attachment and a concealed lens cloth pull tab sleeve…let’s get to it!
I started this project by picking up a leather strap from District Leather Supply
I wanted this strap to be really strong, so I went with an 8-10oz thick leather strap made by Wicket & Craig
Because I use tripods a lot and find a camera strap gets in the way, I wanted to incorporate some quick release links so I can quickly remove and attach the strap to the camera
I’m a big fan of Peak Design’s anchor links because they are really strong and equally easy to use
They come on most of their products, but you can also buy just a set of the links which is perfect if you’re making your own strap like we are today
Supplies
Tools & Materials Specific to
this Project (Affiliate Links):
· Wicket & Craig Leather Strap - https://districtleathersupply.com/collections/lea...
· Peak Design (Quick Release) Anchor Links - https://amzn.to/3rh5Hh4
· Wet Forming Foam - https://amzn.to/34gWcoV
· Weaver Leather French Edger - https://www.weaverleathersupply.com/
· Edge Beveller - https://amzn.to/348BOqd
· Tokonole - https://amzn.to/348BOqd
· Scratch Awl - https://www.highcalibercraftsman.com/collections/...
· Edge Dye Roller Pen - https://amzn.to/2st8YOF
· Glass Slicker - https://amzn.to/3rfvFBy
· Snap Setting Kit - https://amzn.to/3GelYHO
· Snaps - https://amzn.to/3s49YUf
EcoWeld Adhesive - https://www.tandyleather.com/en/product/ecoweld-w...
Step 1: Cutting the Strap to Size


The strap I received was 1 and a half inches wide, but I wanted it to be a little thinner, so I decided to cut it down to only an inch wide
Now you could easily do this with a straight edge and rotary cutter or X-acto, but I have this strap cutting tool that makes it super easy and precise
You simply set the strap cutter to the width you want, feed the strap through the slot and then keep pulling it through until the whole strap is cut
The length of the strap is completely up to you, but I found that I wanted it to be 38 inches long from end to end
Each end is going to overlap itself to attach it to the quick release links, so to account for the overlap I added two inches at either end making the total length of the strap 42 inches long
Step 2: Skiving the Ends

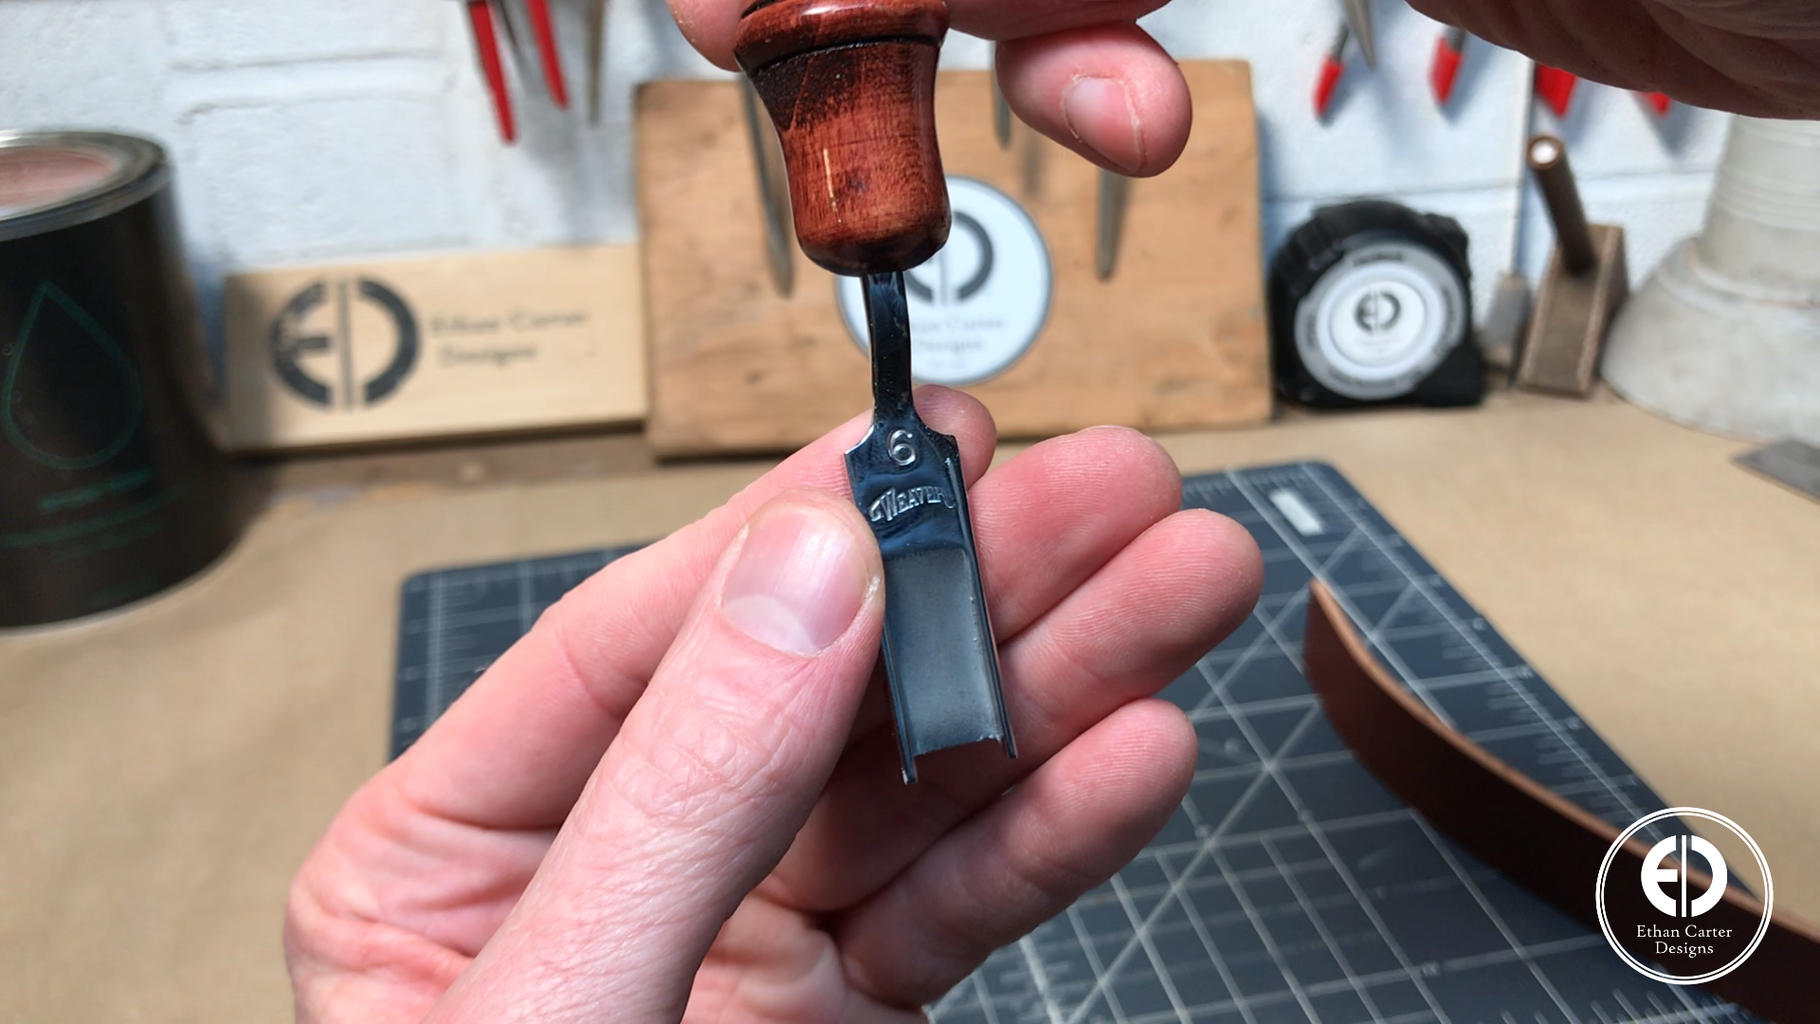


Where the leather attaches to the quick release links and doubles back on itself, the thick leather can get kind of tough to manipulate
So to fix this I decided to thin that section out by skiving it
To do so, I used Weaver Leather’s French Edger tool
As you can tell from the video, this was actually my first time ever using the tool
The tool worked really well, but you definitely have to get the feel for skiving but I was able to make it work
And as you can see, the thinned-out leather definitely makes the bend much easier and cleaner
Step 3: Cutting the Ends to Size


The connection slot on the quick release links was only 3/4s of an inch, so I needed to cut a little off each side at both ends for it to be able to slide through
I marked in from each edge with my scratch awl and then used my hole punch to punch holes where the cut will start
I punch the holes because this helps prevent the leather from splitting down the road where the two cuts meet
Next, I did a quick test fit to make sure everything would work
Step 4: Finishing the Edges


Before attaching the quick release links, I decided to do the edge finishing
I started by using my edge beveller to add a bevel to the top and bottom edges of the strap
There’s something really satisfying to edge beveling when you have a sharp tool
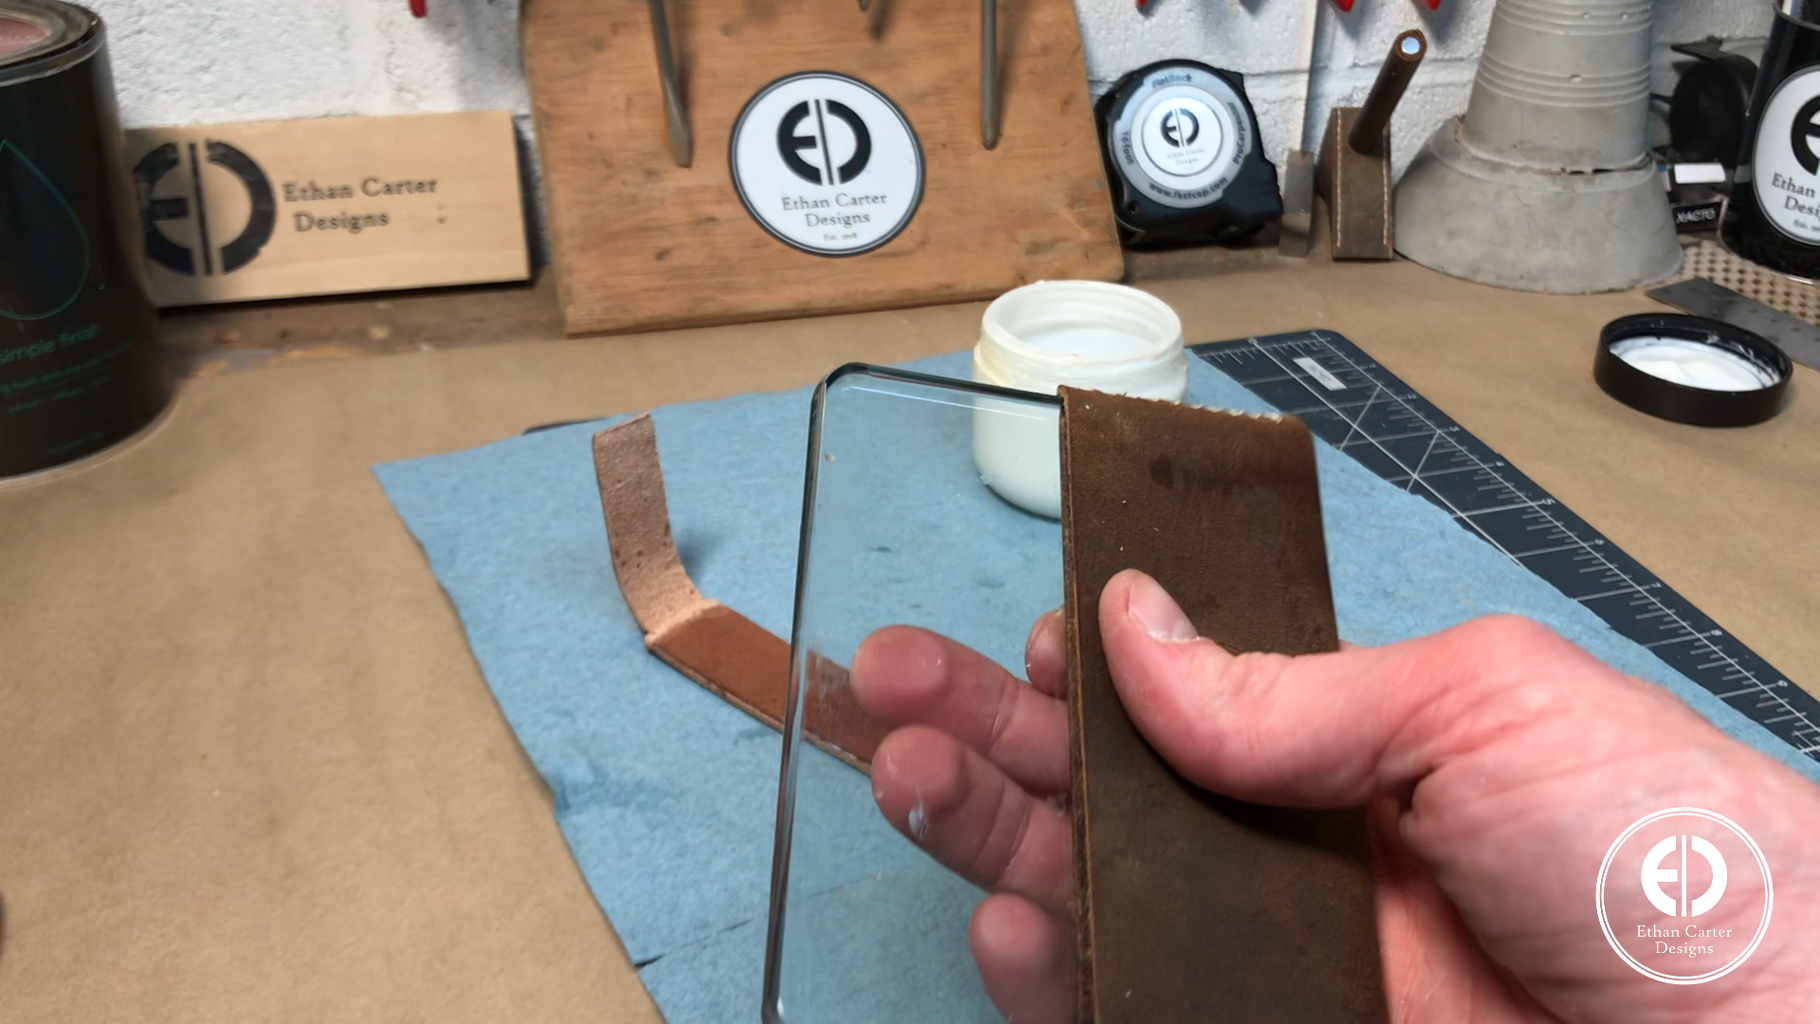
Next, I moved on to cleaning up the flesh/unfinished side of the leather
Now this strap is actually pretty good as is, but sometimes the unfinished side can be really “pulpy” and this is a great trick to smooth it out
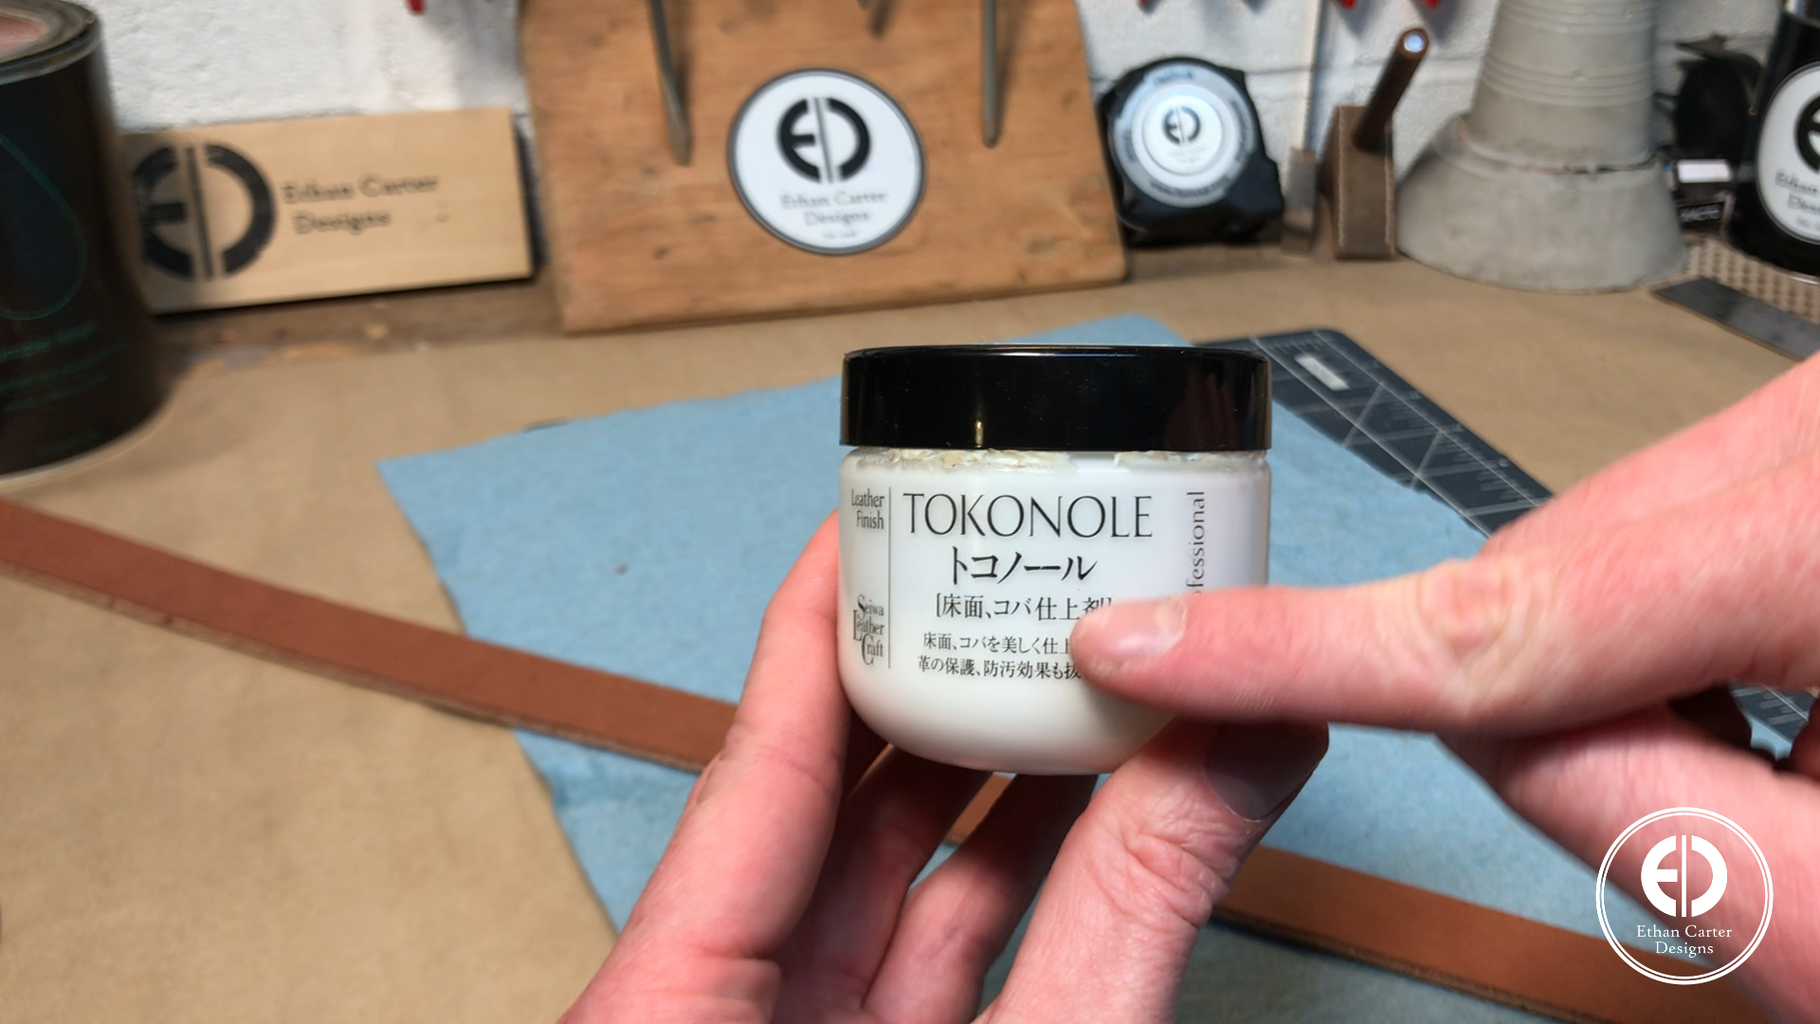
I start by spreading some Tokonole leather finish to the unfinished leather
Then I use a glass slicker to really work it into the leather and smooth everything out
Next, I moved onto finishing the strap edges
I again used Tokonole, but this time I used their brown version
I use this instead of edge paint or finish because I find that it adds just enough color to the edge and saves me a few steps…but it’s all personal preference
I start by carefully spreading a small amount along the edge using a dye roller
Then I use my edge burnisher to work it in and burnish the edge at the same time
Once that dries, I come back with a piece of canvas and some of the clear Tokonole
I again spread a small amount on the edge with my finger and then use the canvas to polish the edge
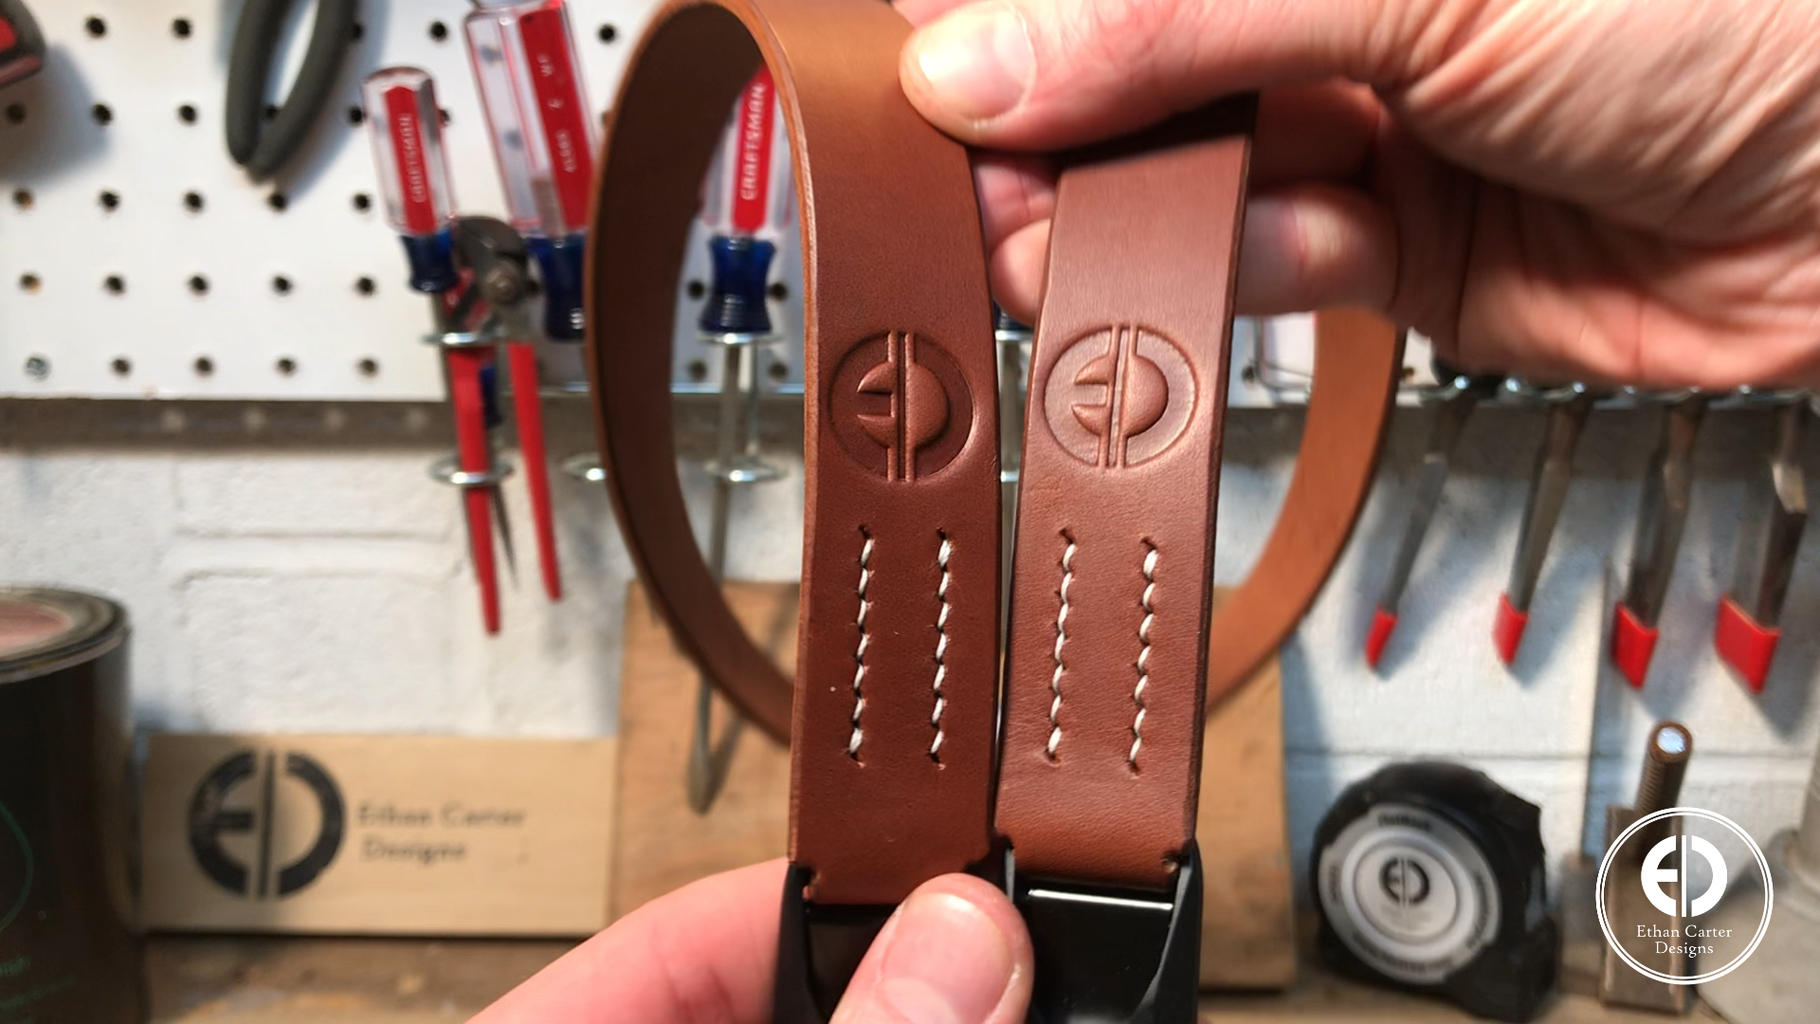
Step 5: Debossing My Logo


Before finally connecting the quick release links, I decided to add my logo to the strap for a little branding
To do this I used my leather stamp and a one-ton arbor press to deboss my logo into the leather and man does this Wicket & Craig leather deboss well!
Step 6: Attaching the Quick Release Links


I started by using my scratch awl to mark off where to apply the adhesive
Then I used some of Tandy Leather’s EcoWeld adhesive to attach the strap to itself
EcoWeld is super easy to use, you simply apply some to both surfaces, wait for them to get tacky and then stick them together
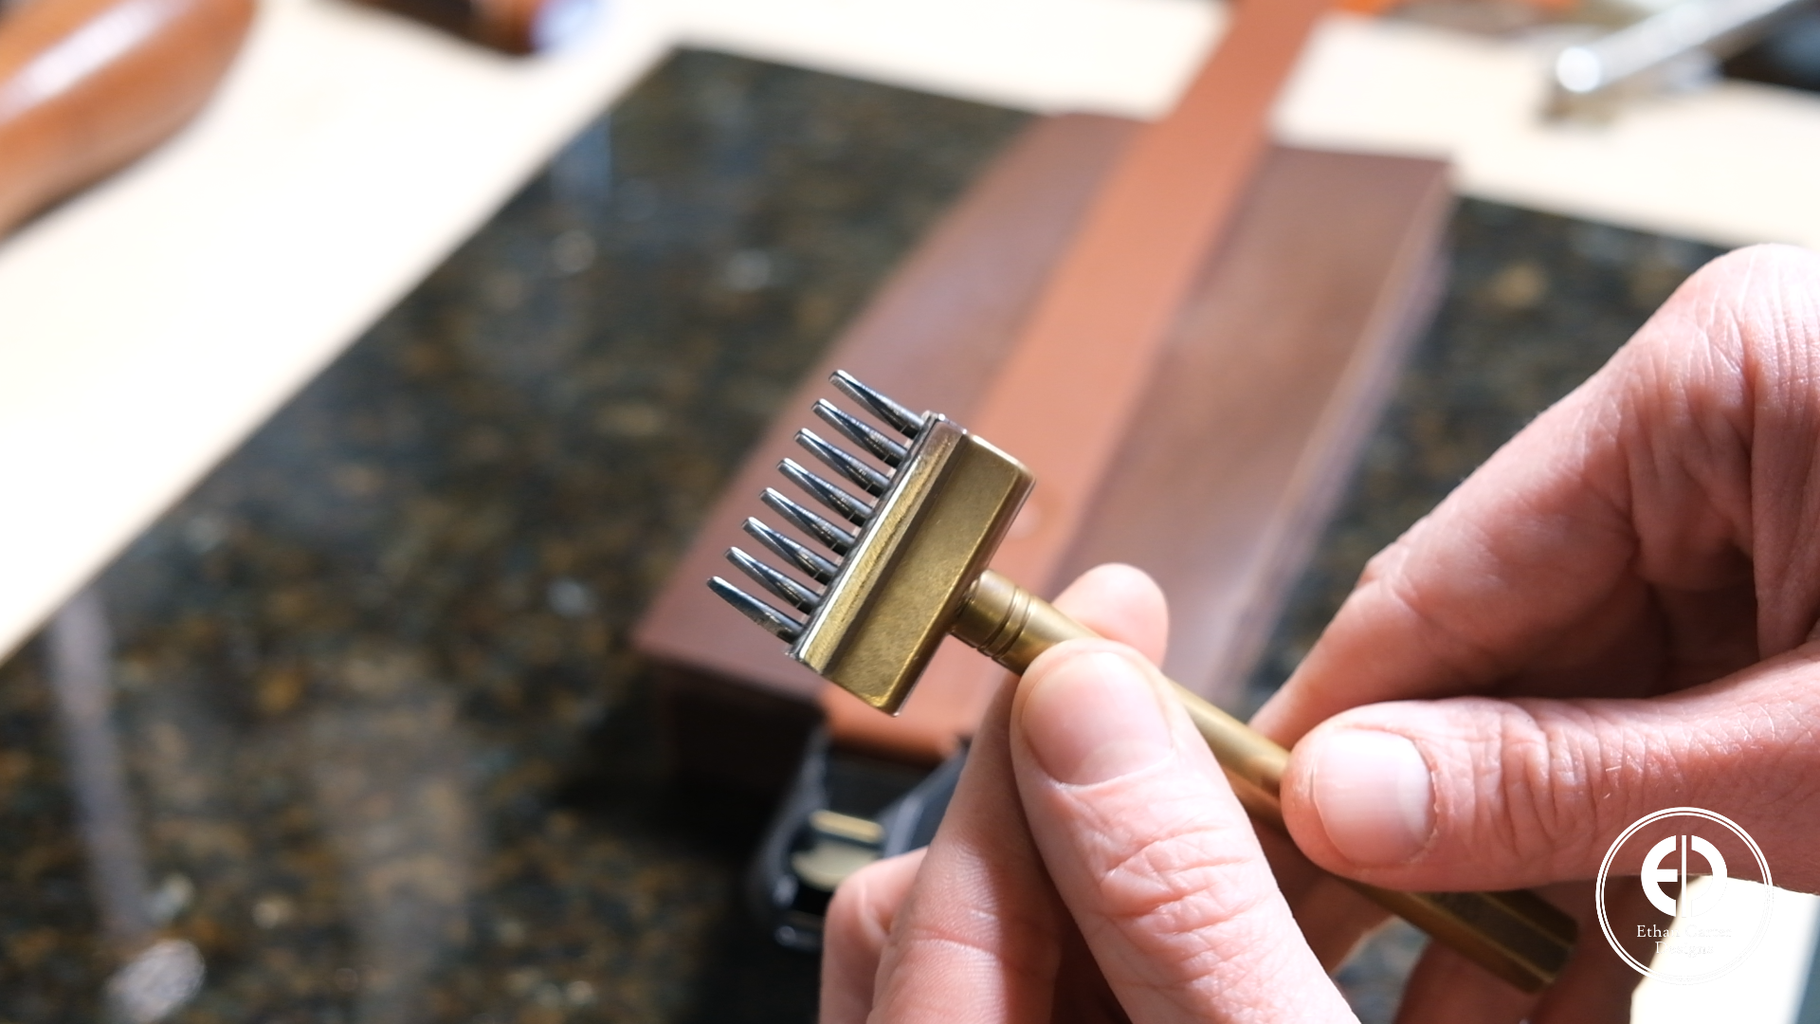
Next, I used my wing dividers to score stitch lines along each side where the leather is overlapped
Then I used my pricking irons to punch the stitching holes
My 8-prong pricking iron was actually the perfect length to do one punch on each side
That wasn’t planned, but I’ll take it!
With all the stitching holes punched, I moved on to the stitching
I made a video dedicated to leather stitching where I go in depth into the process of how to do this saddle stitch and others and I’ll leave a link here (https://youtu.be/PNy6wGvmww8) in case you want to check it out
But at a high level, what I’ve found is easiest is to just pick a sequence and then stick to that
For example, I always start using the right needle to stich from the back and then stitch the left needle from the front into the same hole but in front & under the right needles thread.
If you continue this sequence, you’ll get a very nice-looking stitch pattern in my experience
With that, the camera strap was done and ready to attach to the camera
Now you could absolutely stop here and have a completely functional leather camera strap, but I wanted to add a few optional accessories to make it even more useful
Step 7: Wet Forming the Lens Cap Holder


I’m always misplacing my lens cap, so the first accessory I wanted to add was a detachable wet formed lens cap holder
By wet forming the case I won’t need to add anything to keep the lens cap in because the fit will be just tight enough to keep it secure
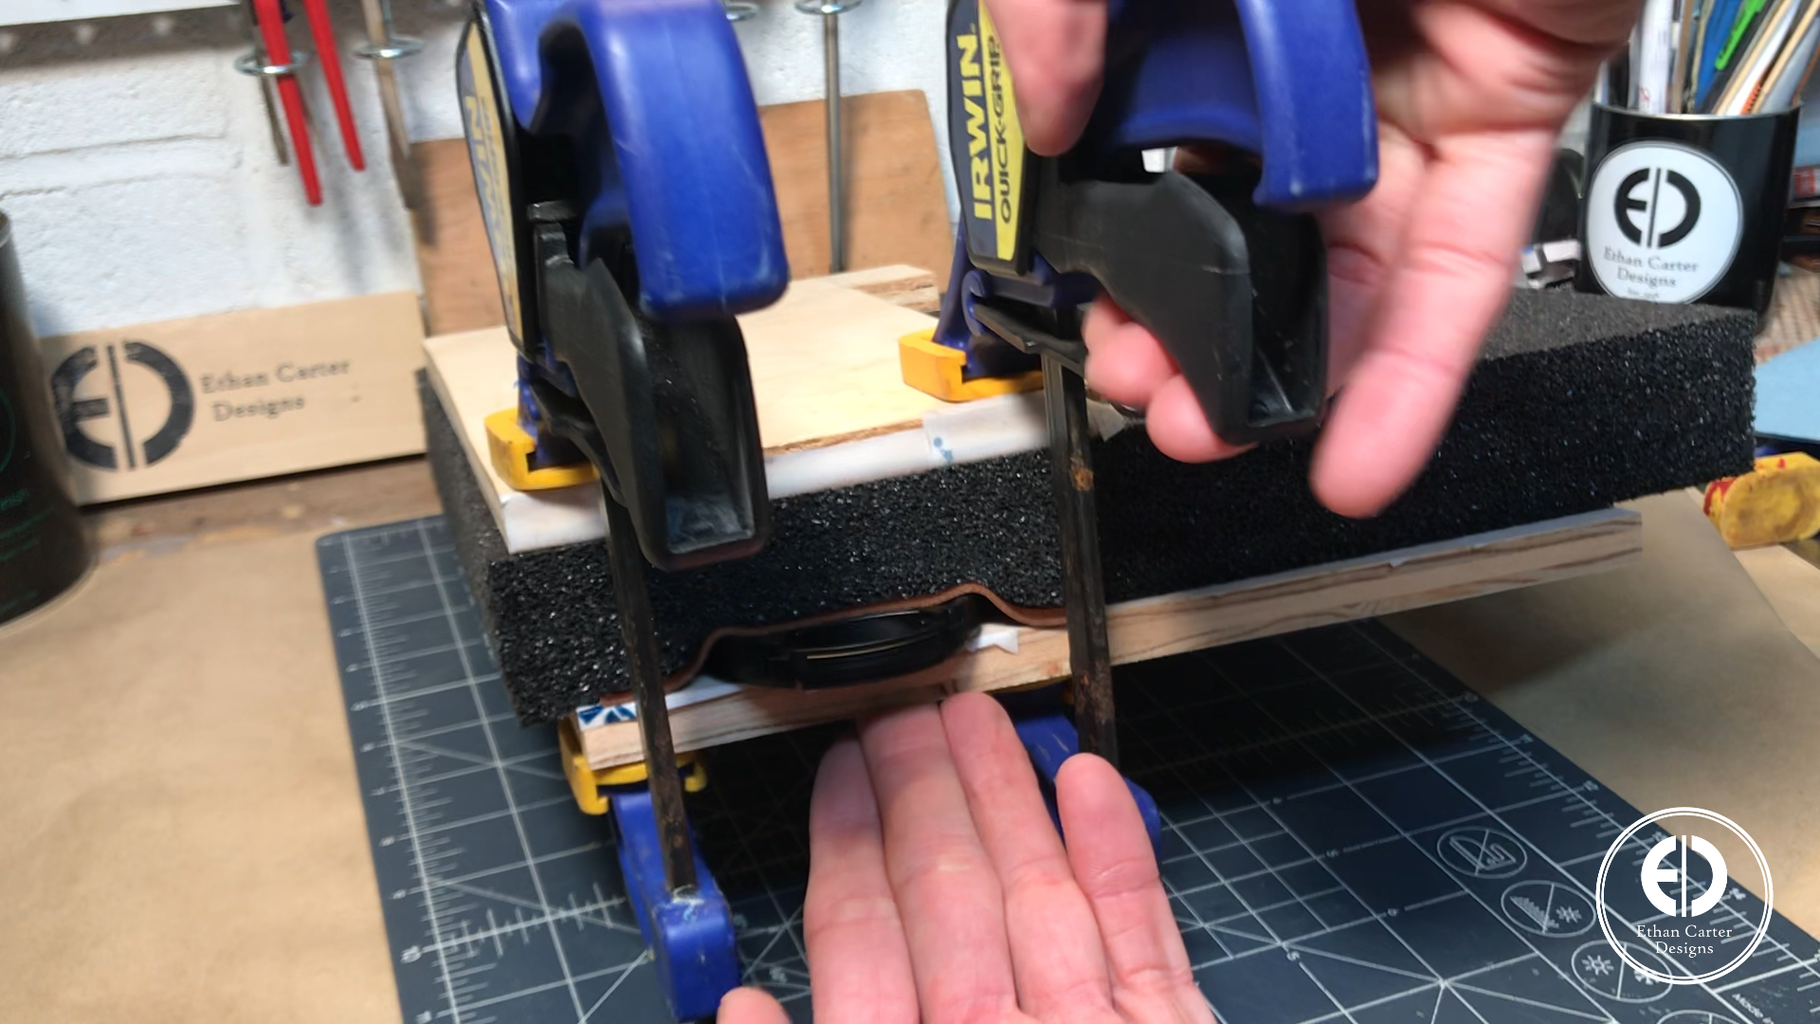
For shallow forming like this, I’ve found this foam process to be the easiest and most effective
You start by soaking the leather in room temperature water for 15 minutes or so
While that’s soaking, I added some tape to two pieces of wood and grabbed 1.5-inch-thick piece of foam that will sandwich between the two pieces of wood with the leather and the lens cap
Once the leather is completely saturated, I pat it dry then sandwich it on top of the lens cap between the wood and foam and apply some clamps
The foam forces the leather down over the lens cap while the leather dries and if everything works well the leather will dry holding the shape of the lens cap
And as you can see, it worked really well – it even almost shows the Fuji logo
Next, I moved on to cutting out the back piece of leather
Step 8: Attaching the Lens Cap Holder Backing


I again used my scratch awl to mark out the top contour of the lens cap onto the back piece of leather and then cut it out with my X-Acto
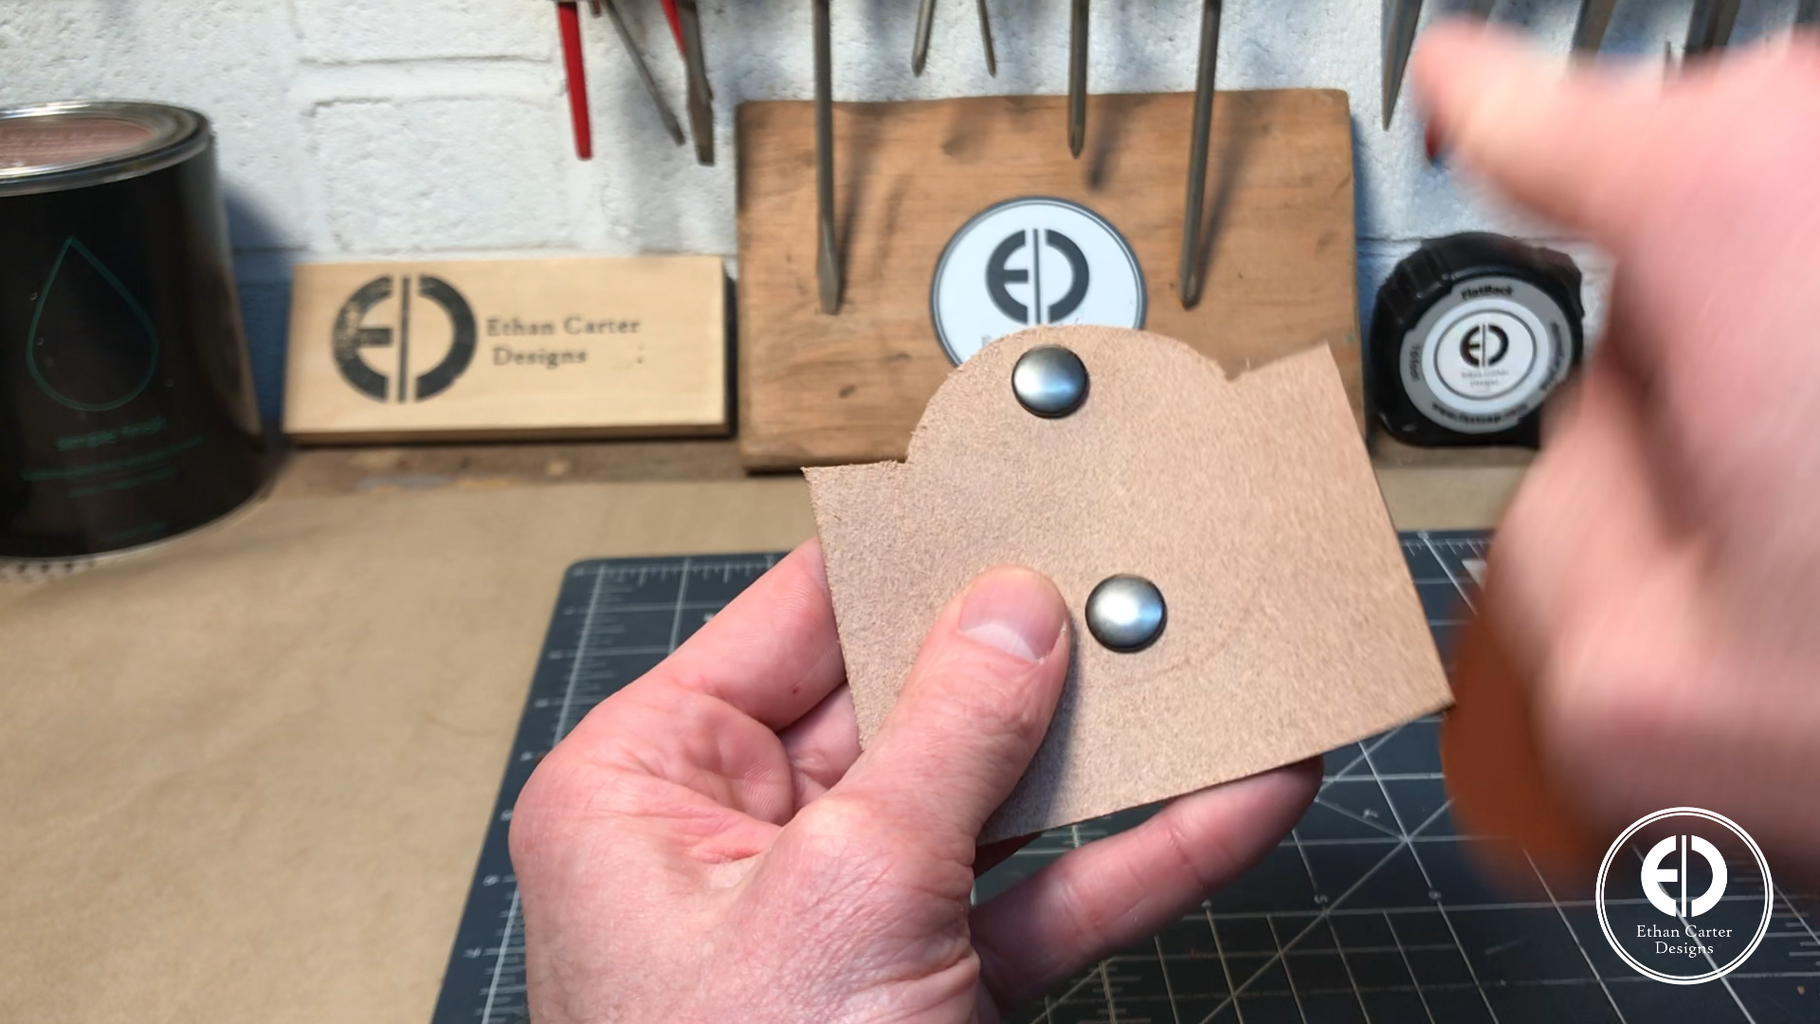
To allow me to detach the lens cap holder from the strap, I added some snaps onto the back of if before gluing the front and back together
Being able to detach it allows me to make lens cap cases for various lenses and still use the same strap
Next, I again used some EcoWeld to glue all the pieces together
Then I used my X-Acto to cut off the excess leather around the edge
To add more strength, I decided to add some stitching around the edge and again started by using my wing divider to score a stitch line
Then I used my pricking irons to punch the stitching holes
To ensure the spacing between each hole stays consistent as I work my way down the line, I always make sure to place the stitching chisel point furthest to the left in the last hole of the previous set of holes I punched
Then I again used the saddle stitch I explained earlier to stitch everything together
As I mentioned at the beginning, the wet forming creates just enough grip to hold the lens cap in the case while still being able to quickly remove it when needed
With the lens cap holder done I moved onto the concealed lens cloth pull tab sleeve
Step 9: Making the Lens Cloth Pull Tab Sleeve


I started by cutting a microfiber cloth down to my desired size
I wanted to make the pull tab sleeve the same 1-inch width as the strap, which didn’t end up being wide enough and I made a 1.5-inch wider one later off camera, but the steps are the same
I started by cutting the front and back pieces then I used a snap to measure how wide to make the pull tab the lens cloth will be attached to
Then I attached the lens cloth to one end with some stitching
To see how long the sleeve should be, I just used the pull tab and lens cloth as a reference
Just like the lens cap holder, I wanted to be able to detach the sleeve if I want to, so I added two snaps to the back piece again
For the snaps I used a snap setting kit from Tandy Leather and just followed the instructions
To secure the pull tab closed, I also added a snap on the bottom of the front piece
Next, I used some EcoWeld on each side to attach the front and back pieces
Then once again I scored a stitch line, pricked some stitching holes down each side and then used the saddle stitch again to stitch it together
Once the sleeve was assembled, I could push the pull tab through it and then measure where to add the snap on the pull tab
Step 10: Adding Snaps to the Strap


With the two accessories complete, the only thing left was to add some snaps to the strap itself
I simply pushed the sleeve snap side down on the strap where I wanted to mount it on the strap, which left indentations I used as a guide to add the snaps to the strap
Then I repeated the same process on the other side of the strap with the lens cap holder
And with that, the strap was done!
Thanks so much for following along with this project! I’d love to know what you think. Leave a comment below and don’t forget to watch the video on my channel!
See you on the next project!

Runner Up in the
Photography Challenge


